How to Stroke Around Text
2020年8月11日

In this article, I’ll show you how to make an outline around text in Illustrator.
This is very effective for posters and flyers that you want to make eye-catching.
Let’s try it out!
Use the Appearance
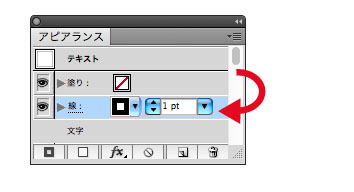
Prepare the text and open [Window] > [Appearance].
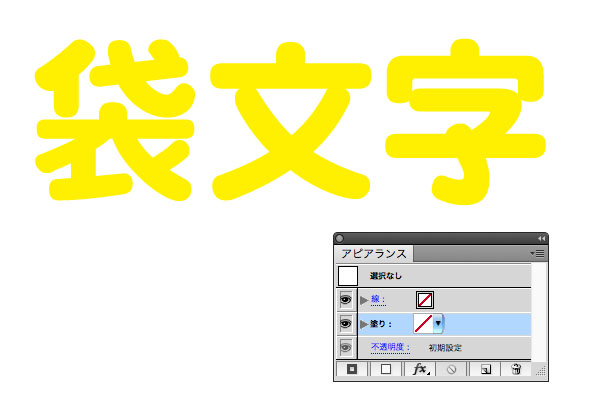
Select the text and press the “Add New Stroke” button at the bottom of the Appearance panel to add a line.
In this case, be sure to drag the “Stroke” under the “Fill”.
(The text will be collapsed if the stroke is on top.)
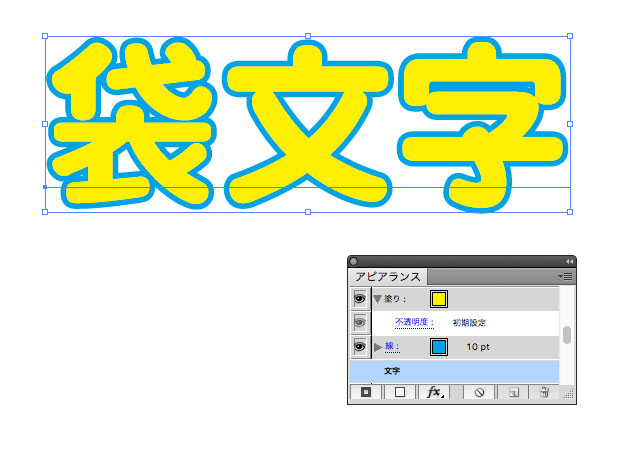
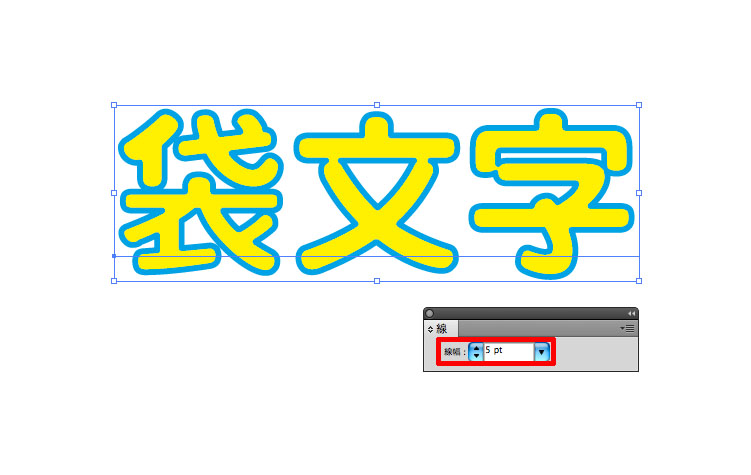
Set the “Fill” and “Stroke” in the Appearance Panel to your desired values and you’re done.
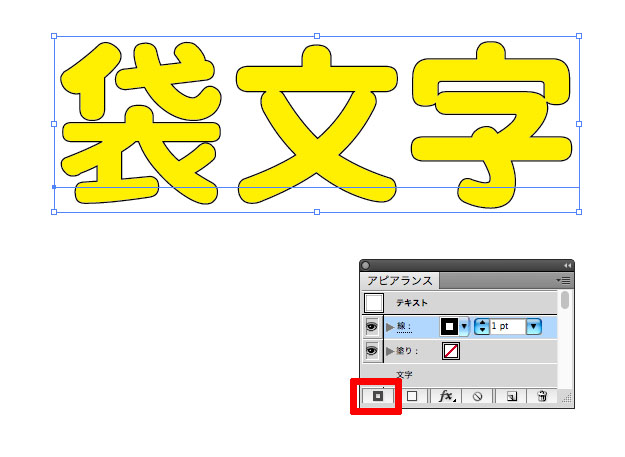
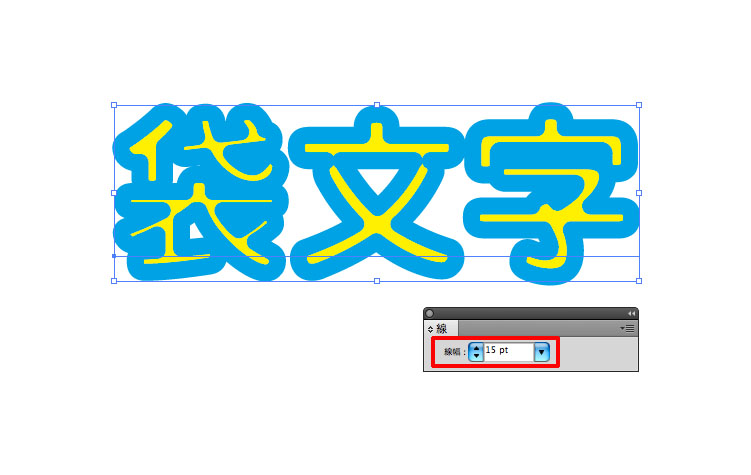
Bad example 1
This is a bad example.
For example, the way you apply color to the stroke of the original text.
At first glance, it looks good.
However, if you make the stroke thicker, it will overlap with the fill of the text.
Bad example 2
In the following example, choose [Edit] > [Copy] > [Paste to Back] and make the stroke thicker.
(Use the shortcut key “Command+C” to copy and “Command+B” to paste it backwards.)

However, this method requires you to fix both the front and back text when correcting it.
It takes twice as much time and effort, so don’t do it this way.
That’s the end of the instructions on how to stroke around text.
関連記事
-
 How to Use the Pathfinder in Illustrator
 -
How to make your own pattern brushes
-
Using the Touch Type Tool for Typography
-
Design a 3D object in Illustrator!
-
Making Olympic Rings Using Command X and Command F(B) in Illustrator
-
How to Create Superscript or Subscript in Illustrator
-
Symmetry and vertical symmetry: Mirror drawing is useful
-
[Challenge] Pen Tool Practice: Can you do it in one minute?