【Photoshop】Vanishing Point(消点)〜立体的な看板に画像をはめ込む
2024年10月9日
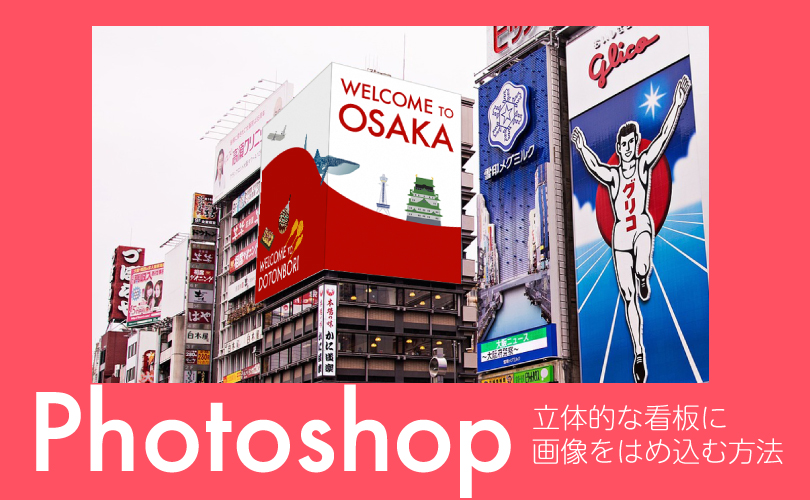
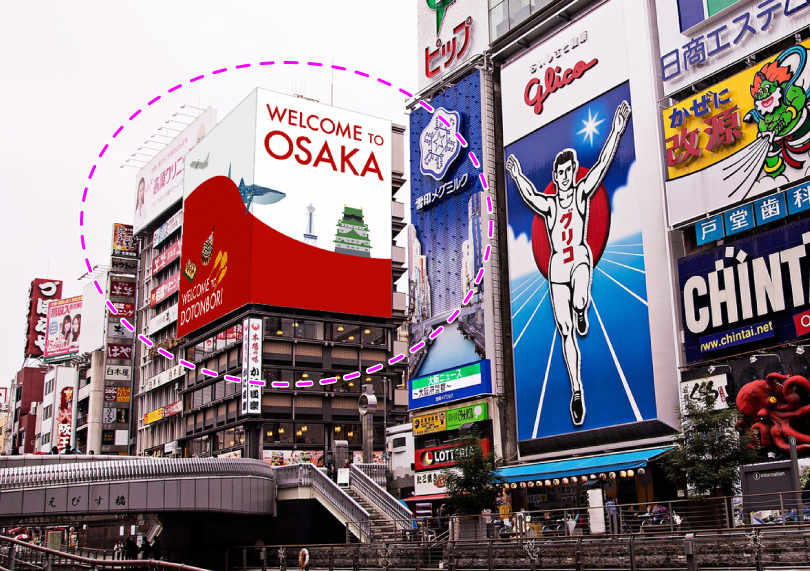
Photoshopで、Vanishing Point(消点)の機能を使い、側面のある立体的な看板に画像を簡単にはめ込む方法をご紹介します
➡︎
目次
1.下準備
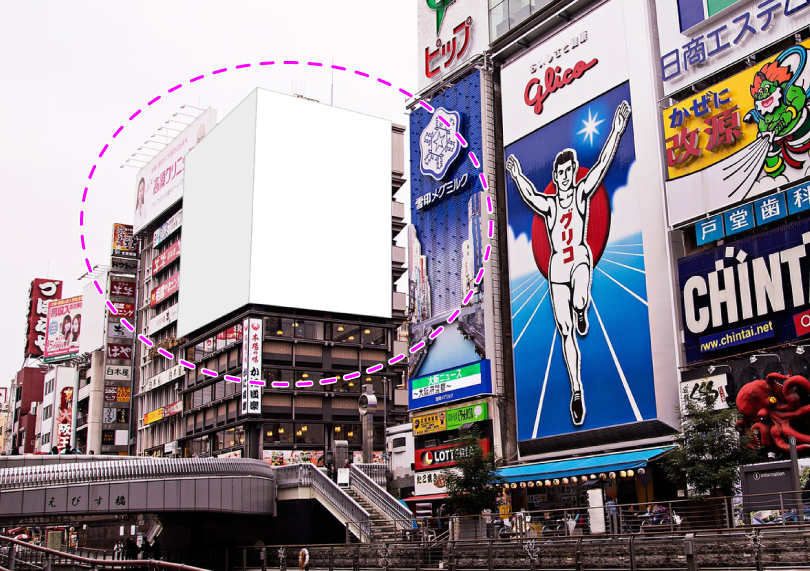
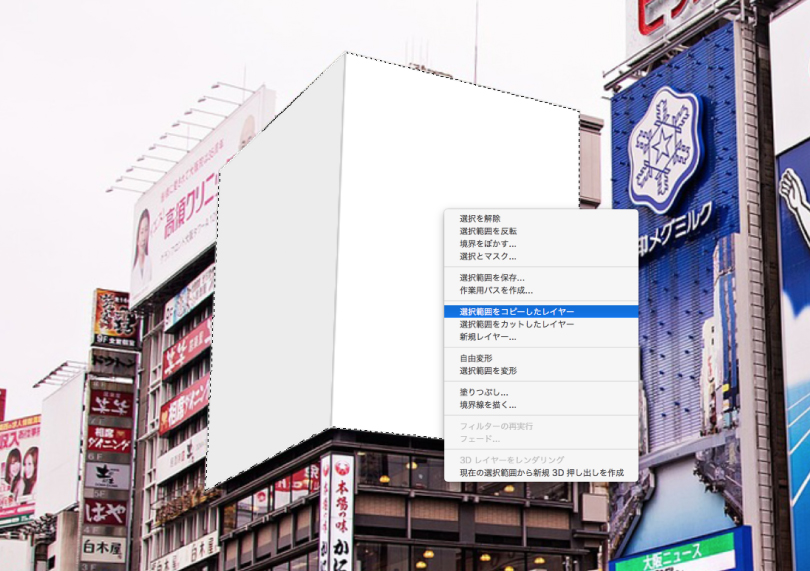
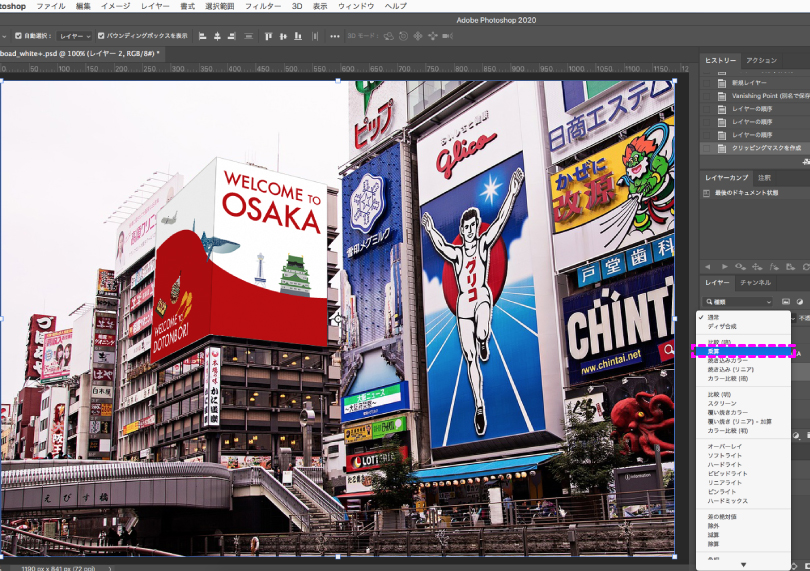
1.看板部分の選択範囲を作成し、右クリックで選択範囲をコピーしたレイヤーを作成します
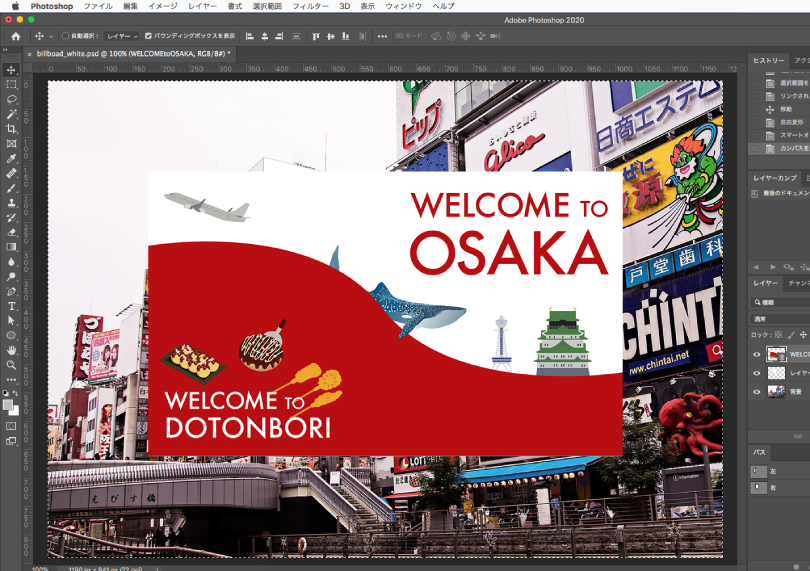
2.はめ込みたい画像を配置し、レイヤー全体をコピーしておきます(後で使います)
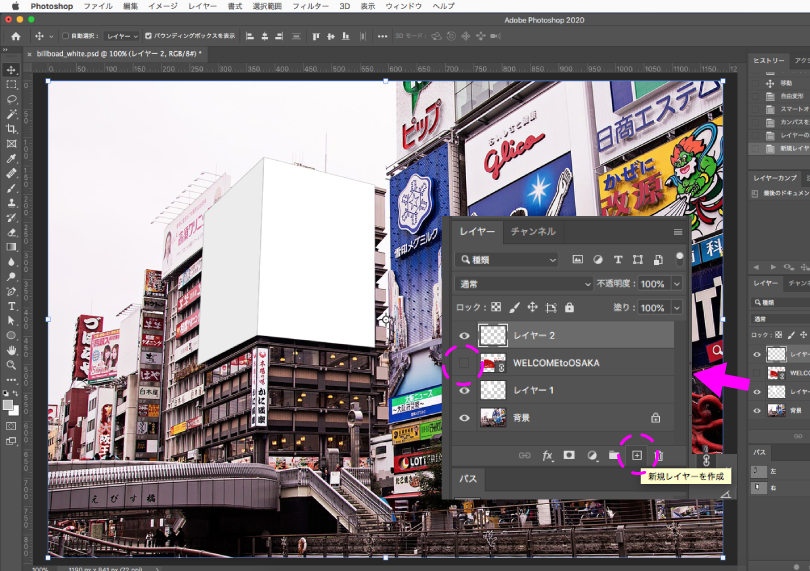
3.はめ込みたい画像は非表示にし、その上に新規レイヤーを作成します
2. Vanishing Point(消点)
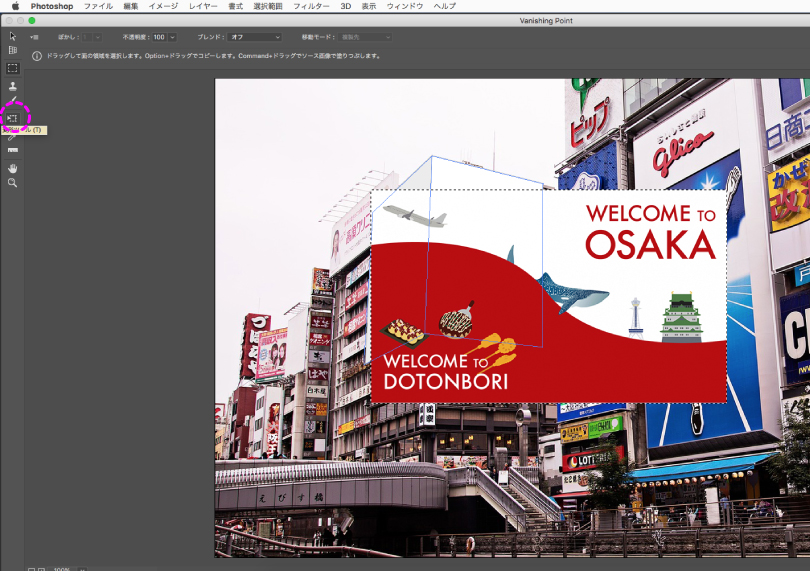
1.フィルター/Vanishing Point(消点)を選択します
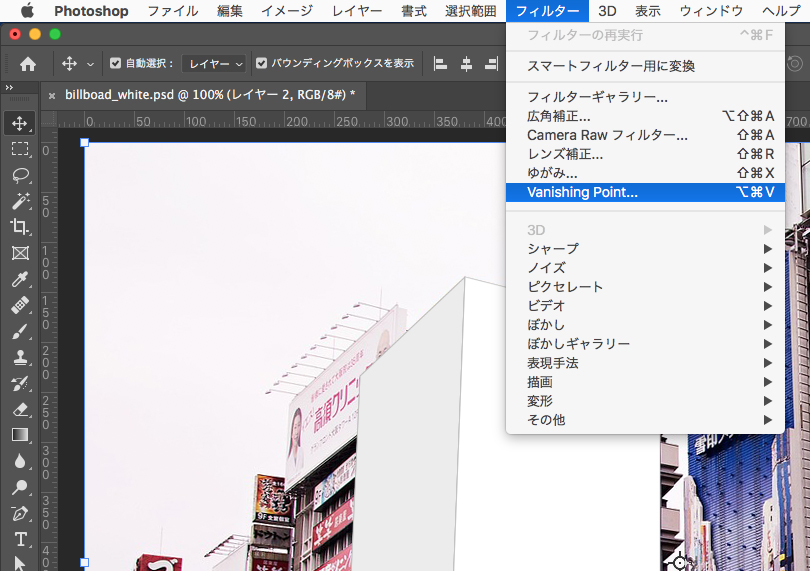
2.Vanishing Pointダイアログボックスで、面作成ツールを使用し、看板の四隅をクリックすると遠近面が作成されます
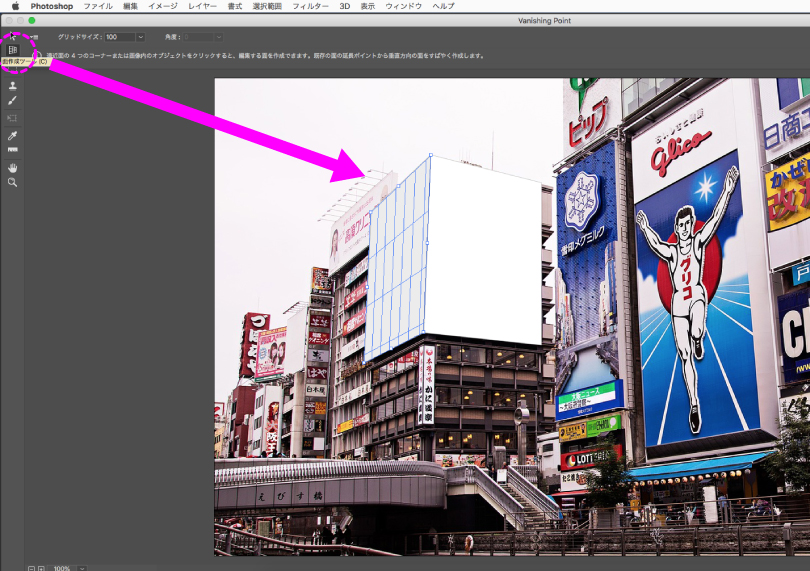
3.さらに面作成ツールを使用し、もう1面と接する辺の中心を始点としてドラッグすると、遠近法に基づいたもう1面が自動的に作成されます
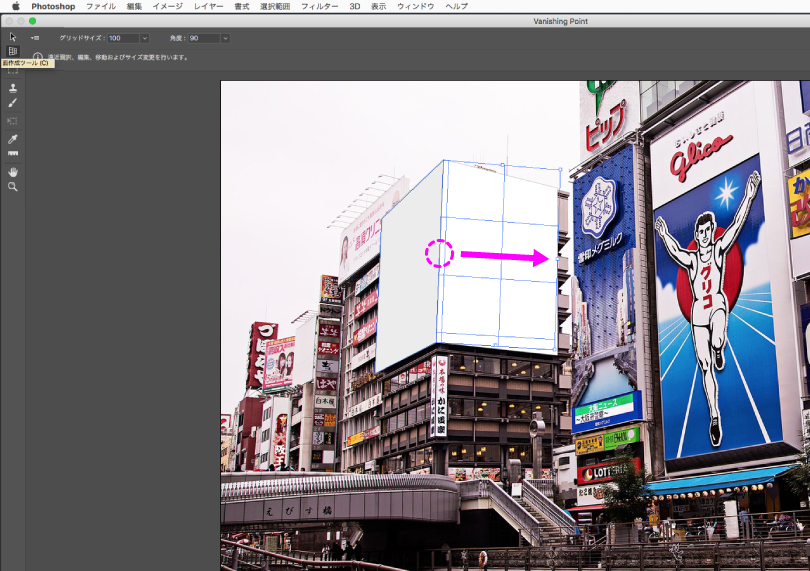
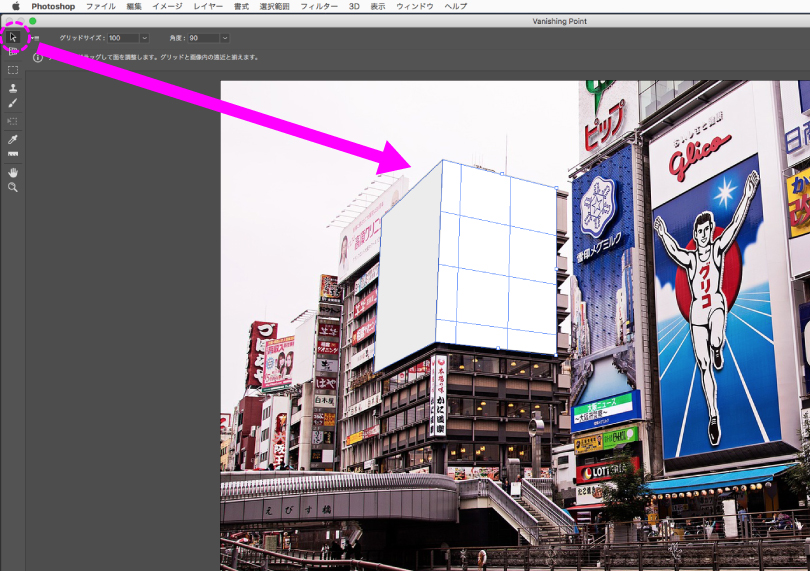
4.看板の形状と大きくズレる場合は、面修正ツールに持ち替えコーナーポイントを調整してください
5.先ほどコピーしておいたはめ込みたい画像をペーストし、変形ツールに持ち替えます
6.画像の大きさを調整し看板部分に流し込むと、先ほど作成した遠近法に合わせて画像が変形します
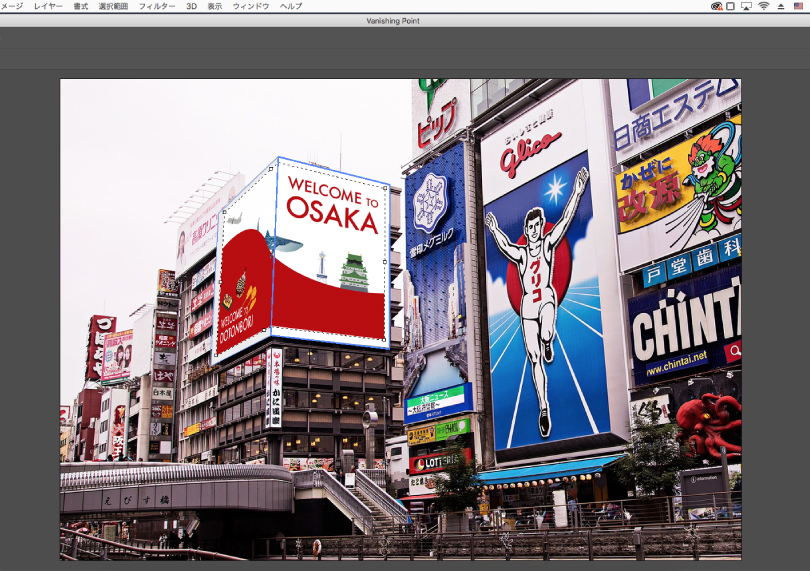
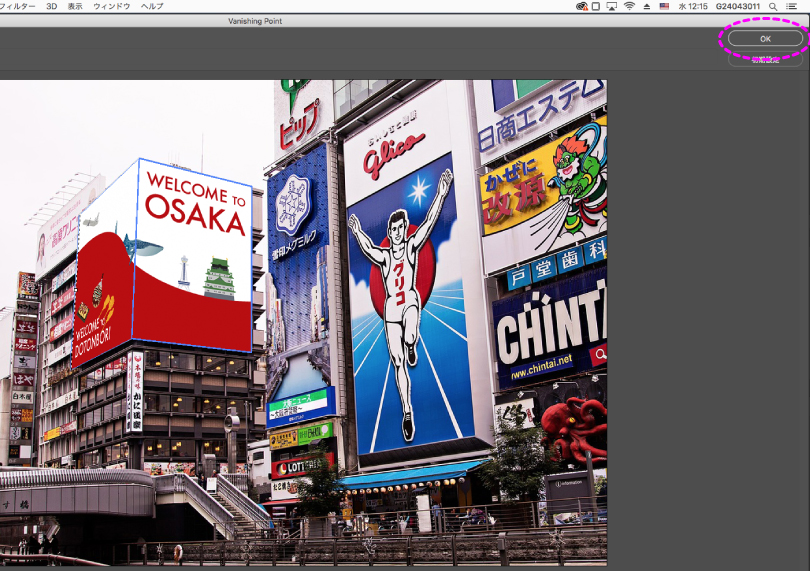
7.看板に合わせて微調整を行い、OKをクリック
3.画像を看板に馴染ませて完成!
1.はめ込み画像のレイヤーを看板部分のレイヤーの上に移動し、クリッピングマスクします
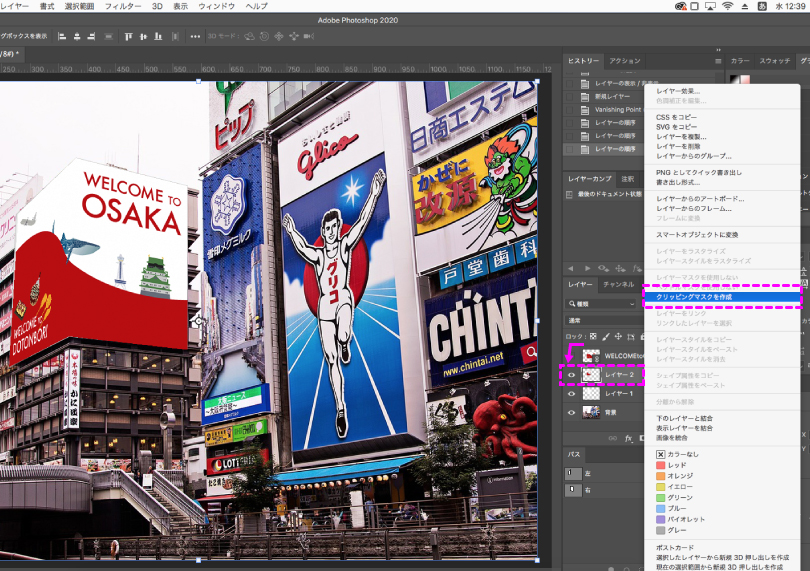
2.レイヤーパネルで描画モードを乗算に変更し、はめ込み画像を看板に馴染ませます(完成!)
完成
屋外看板のほか、パッケージデザインや店舗デザインにも活用できます。お試しください!

![自動処理[バッチ]で作業スピードアップ](https://soft-no-sosa.com/wp/wp-content/uploads/2020/06/eye_catch-8-300x185.jpg)