Easy drawing with Shape tools in Illustrator
2020年6月22日

If you have a feeling of being not good at drawing, I recommend this simple way.
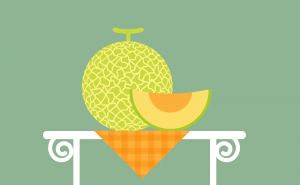
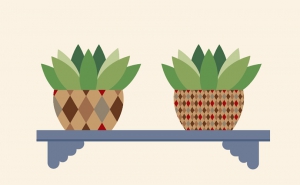
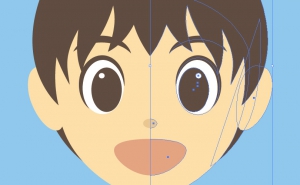
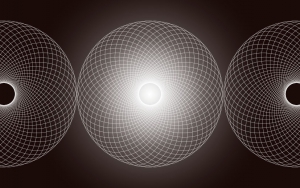
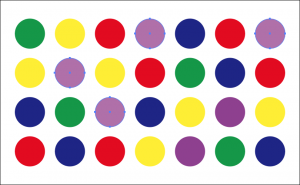
First, please take a look these illustrations.


The similarity between two illustrations is that they are not drawn.
The shapes are “assembled” with only Shape tools in Illustrator.
You can see that shapes are combined in outline view.
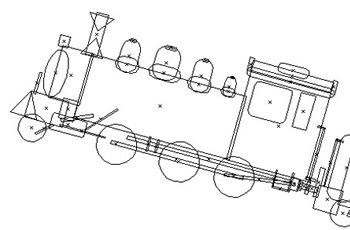
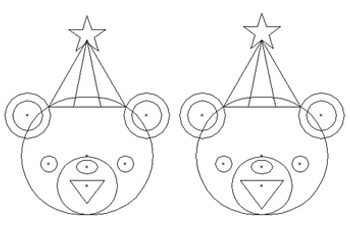
There are no complex shapes because the only way to deform a shape is by “Scaling” and “Rotation” it in the Bounding Box.
It didn’t take much time.
To draw a good picture or to master Illustrator, you need studying and practicing and time to do so.
However, if you have difficulty in drawing or are not used to it, I recommend this way.
So let’s start drawing with the Shape Tool!
1.Use the Shape Tool
2.Change the shape
3.Assemble shapes
1. Use the Shape Tool
・Types of Shape tools
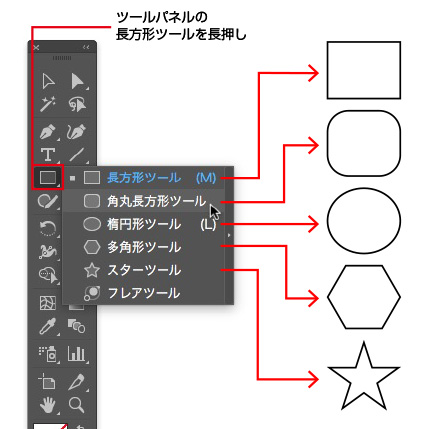
There are seven types of tools in Illustrator Shape Tool:[Rectangle tool], [Rounded Rectangle tool], [Ellipse tool], [Polygon tool], [Star tool], and [Flare tool].
In this time, we’ll use six different types of shape tools, except for the flare tool.
・How to use the Shape Tool
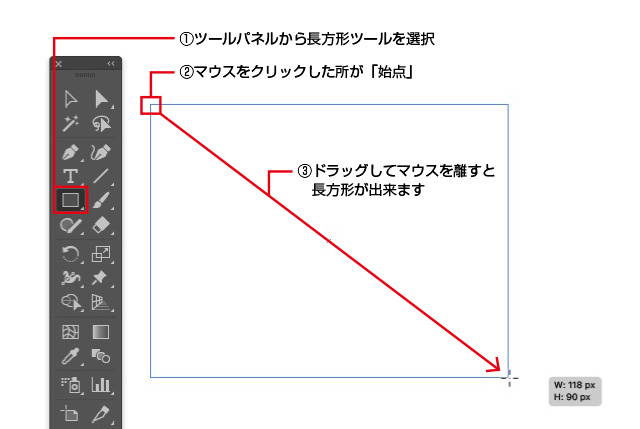
Let’s start by creating a rectangle with the Rectangle tool.
Point
When you select a tool and just click an artboard (but don’t drag), the dialog box will appear. You can create a shape by specifying a number.
Try to create other shapes in the same way.
By pressing and holding the Rectangle Tool in the Tools panel, you can select other shape tools.
2.Change the shape
You can now create shapes by dragging.
Next, try to change the shape by pressing a key while dragging.
・In case of changing to a square or regular circle
![In the case of the Rectangle, Rounded Rectangle and Ellipse tools, you can make a square, rounded rectangle or square circle with the [Shift] key while dragging.](https://soft-no-sosa.com/wp/wp-content/uploads/2018/06/zukei_shift.jpg)
・In case of making horizontal shapes
![In the case of the Polygon and Star tool, you can make horizontal shapes with the [Shift] key while dragging.](https://soft-no-sosa.com/wp/wp-content/uploads/2018/07/zukei_shift2.jpg)
・In case of starting a shape from the center point
![In the case of the Rectangle, Rounded Rectangle and Ellipse tools, you can set the start point to the center point with [option(alt)] key while dragging.](https://soft-no-sosa.com/wp/wp-content/uploads/2018/07/zukei_op.jpg)
・In case of making sharp stars
![In the case of the Star tool, you can make the opposite side straight with [option(alt)] while dragging.](https://soft-no-sosa.com/wp/wp-content/uploads/2018/07/zukei_op2.jpg)
・In case of shorten (lengthen) the length from the center of the star to the farthest corner
![In the case of the Star tool, you can change the length to the farthest corner with the [command(ctrl)] key while dragging.](https://soft-no-sosa.com/wp/wp-content/uploads/2018/07/zukei_co-1.jpg)
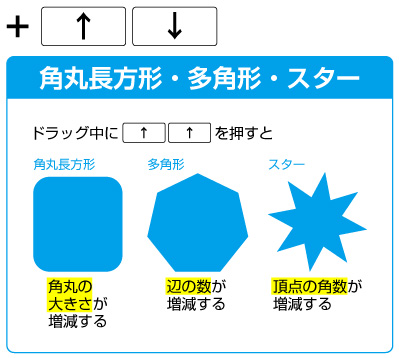
・In case of increasing or decreasing the size of a corner’s roundness or the number of edges or vertices
The next step is the change after the figure has been determined.
・Scaling in the Bounding Box
When you select an object, a Bounding Box appears.
If you move the cursor over a white square in the corner, it changes as shown in the figure.
You can zoom in and out by dragging the cursor.
![The [Shift] key fixes the aspect ratio and the [Option(alt)] key fixes the center.](https://soft-no-sosa.com/wp/wp-content/uploads/2018/07/zukei_b.jpg)
・Rotation in the Bounding Box
When you select an object, a Bounding Box appears.
If you hover the cursor a little outside of the Bounding Box, it changes as shown in the figure.
You can rotate by dragging the cursor.
![The [Shift] key locks the angle to 45 degrees and rotates it.](https://soft-no-sosa.com/wp/wp-content/uploads/2018/07/zukei_kai.jpg)
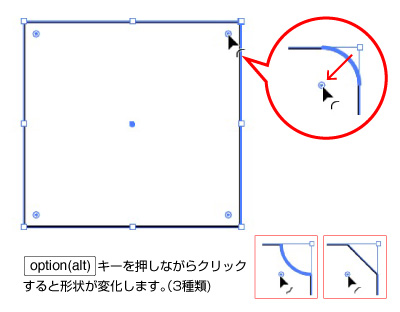
・Changing the roundness of the corners with the Corner Widget
When you select an object, a Bounding Box appears.
A small circle will appear inside the corner. This is the Corner Widget.
You can change the corners roundness by dragging it. You can also make individual changes.
Now, once you’ve made the shapes from the instructions so far, all you have to do is assemble them.
The following section explains the precautions for assembly.
3.Assemble shapes
There are two things to keep in mind when assembling shapes.
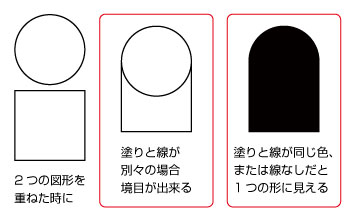
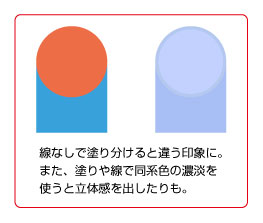
Fill and Stroke
Objects can be colored with Fill and Stroke.
Depending on how you apply the colors, the way you view the shapes will change.
The stacking order of objects
Objects have a stacking order.
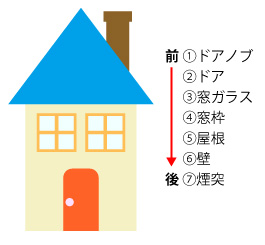
If you create a new object on top of another object, the object below will not disappear.
You just can’t see it because of the overlap.
If you want to change the stacking order of objects, with the object you want to move selected, choose
[Objects] > [Arrange] > [Bring to Front] / [Bring Forward] / [Send Backward] / [Send to Back].
![Select the order from [Arrange]](https://soft-no-sosa.com/wp/wp-content/uploads/2018/08/zukei_zengo2.jpg)
[Bring to Front] places the object at the front of all objects in the layer, [Bring Forward] moves the selected object forward, [Send Backward] moves the selected object back, and [Send to Back] places the object at the back of all objects in the layer.
This is the end of the explanation of how to use the Shape tools and the color and stacking order.
You can start by deciding what kind of illustration you want to make, or you can make the parts first and then assemble them.
I think you’ll get used to “grasping the general shape” because you can assemble it with simple parts.
I hope you will enjoy learning how to do it in a playful way.
There are more features and I hope to introduce them in another article.
関連記事
-
 Use Warp Effect in Illustrator
 -
Tracing Hand Lettering in Illustrator
-
Transforming Only Patterns in Illustrator
-
Let’s Create Gold Gradient Text!
-
Symmetry and vertical symmetry: Mirror drawing is useful
-
How to Make a Spirograph in Illustrator
-
How to Create Screen Printing Effect in Illustrator
-
How to Select All Objects of the Same Color