Tracing Hand Lettering in Illustrator
2020年6月30日
Trace and digitize Hand Lettering in Illustrator!
Lighten the color of the draft and lock it
First, open the scanned handwriting in Illustrator.
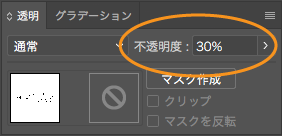
Reduce the opacity with a [Transparency Panel] to make it easier to trace (This time I set it about 30%).
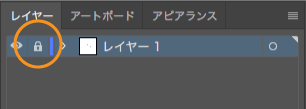
Also, lock the draft layer so that you don’t accidentally move it around while you’re working.
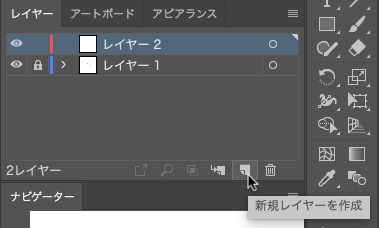
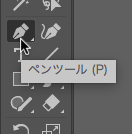
Setting of a new layer and pen tool
Create a new layer for tracing.
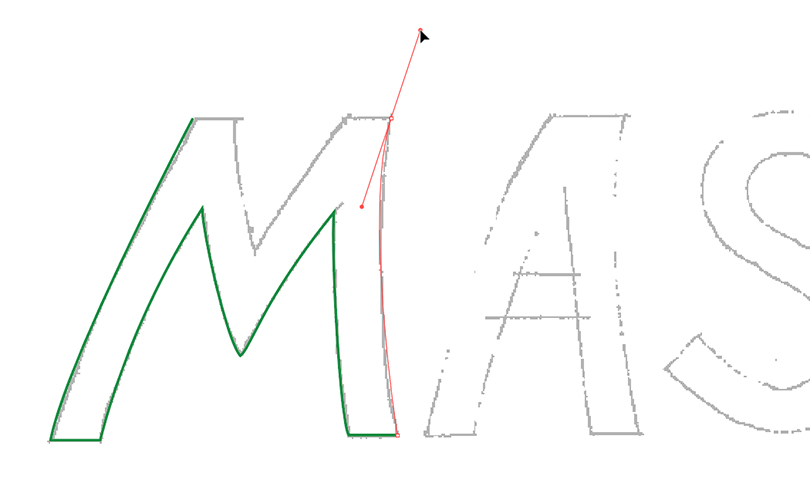
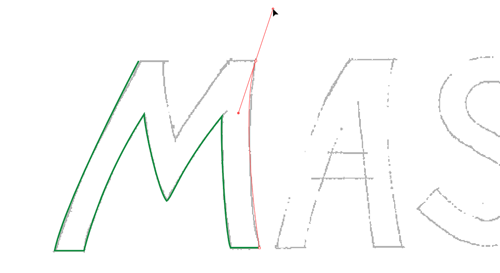
Trace with the pen tool.
At this time, if the fill is set, you cannot see the draft, so leave it off.
Set the stroke to make it easier to do as you like.

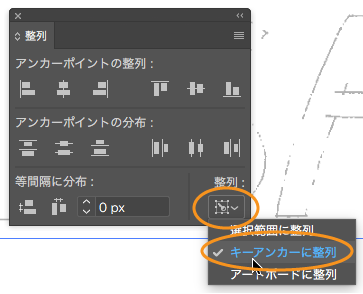
Align to the key anchor
Let’s trace the first letter with the pen tool.
If you don’t know how to draw a curve with the pen tool, check out this article.
[Challenge] Pen Tool Practice: Can you do it in 1 minute?
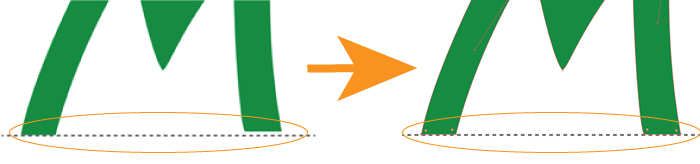
Since this is a hand tracing, the baseline of the M is not slightly aligned.
Select these 4 anchor points using the [Direct Selection tool].
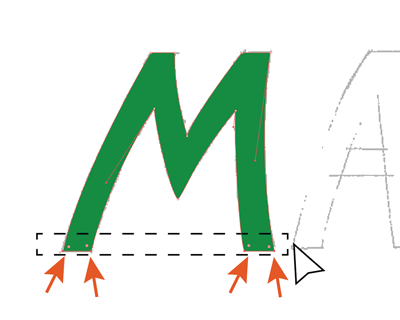
Align the anchor points selecting “Align to Key Anchor”.
A baseline has aligned!
Align to Key Anchor
When you select an anchor point with the Direct Selection tool, the last selected anchor point becomes the key anchor.
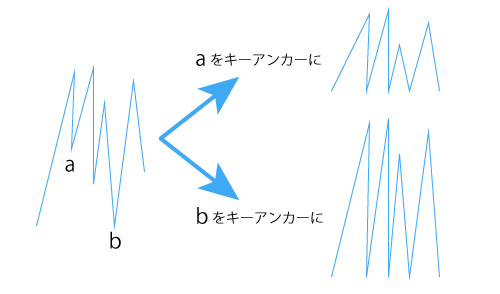
Select anchor points one by one while holding down the shift key and select the last one you want to use as a key anchor.
Or you can do it this easy way.
Select all anchor points at once, deselect the anchor point you want to use as a key anchor by pressing the shift key, and select it again by holding down the shift key.
A Key anchor doesn’t look any different from other anchor points (key objects will have bold strokes).
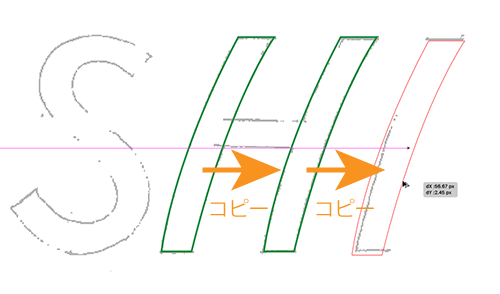
Copy the common parts of a character
Copy the parts of the same shape so that they are consistent.
Copy the vertical line of “H” to “I” as well.
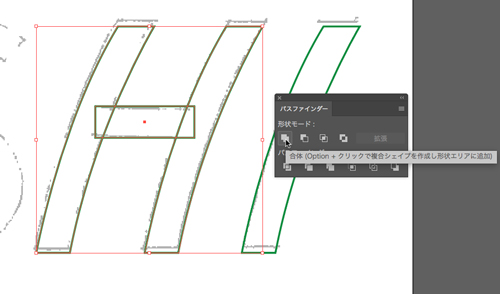
The horizontal bars of “H” and “A” are drawn with the Rectangle tool.
Select the vertical and horizontal bars and click “Unite” in the Pathfinder panel.
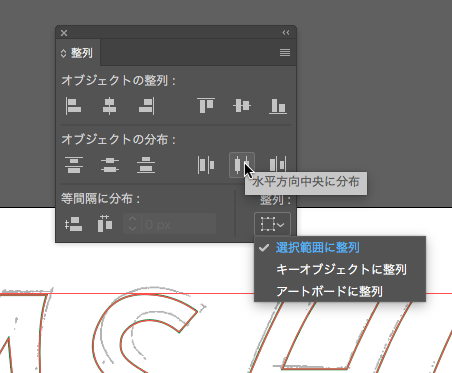
Align Objects
A and S have been made, so copy them and place.
Finally, adjust the letter spacing using the Alignment and Distribution of Objects in the [Align panel].
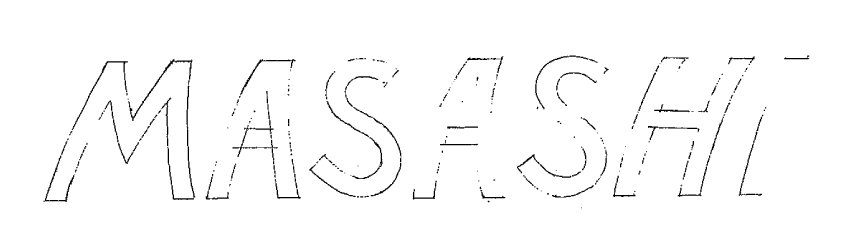
Finished!
Tracing is a lot of fun, isn’t it?