How to Make a Spirograph in Illustrator
2020年6月26日
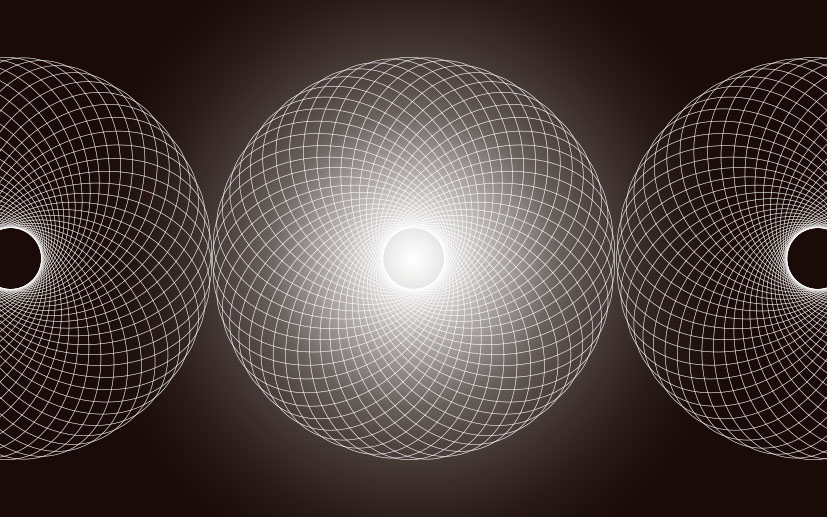
Spirograph
Spirograph is the ruler that produces this beautiful geometric pattern.
It was invented by British inventor Dennis Fisher in 1965, and was commercialized in 1966.
It was later commercialized in Japan and remains a popular toy today.
Have you tried drawing patterns along a gear-shaped ruler?
When you see a Spirograph, does it remind you of the memories of playing with it when you were little? When I was a child, I was fascinated by this magical tool that could draw these geometric patterns endlessly!
This beautiful pattern can be easily and endlessly drawn with Illustrator’s Rotate Tool.
To be exact, every element of a spirograph is complex and difficult to recreate completely, but it is possible to reproduce it with a few simple operations.
So let’s go back to our childhood and create a spirograph!
The basic way to make a spirograph
Creating by specifying a reference point
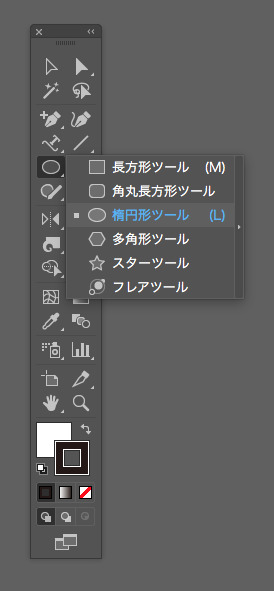
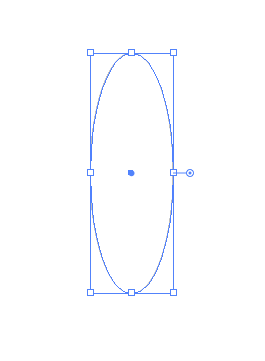
1. Start up Illustrator and create an elongated circle on the document using the [Tool Panel] > [Ellipse Tool].
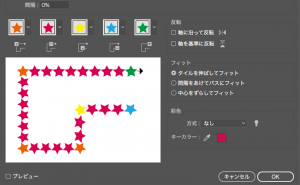
2. Click [Tool Panel] > [Rotation Tool] just once.
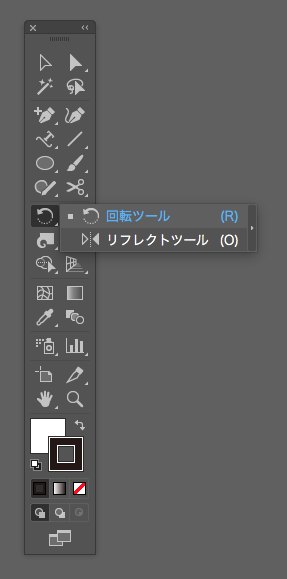
A blue reference point appears in the center of the object.

A reference point
Move the cross cursor to the point you want to use as a reference.
*If you want the reference point to be at the center of the object, you don’t need to move it.
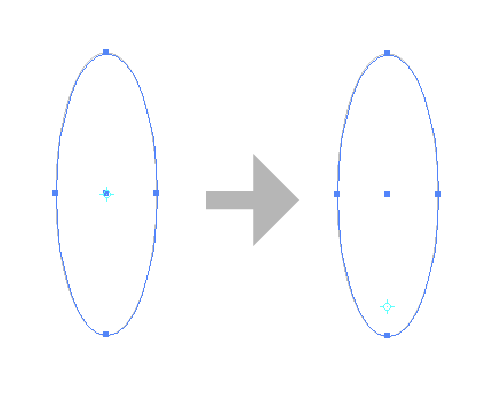
3. Based on the reference point, drag and rotate the object to determine the angle holding [Option] key.
(If you hold down [Option]+[Shift], you can rotate it by 15 degrees. This time, I rotated it by 45 degrees).
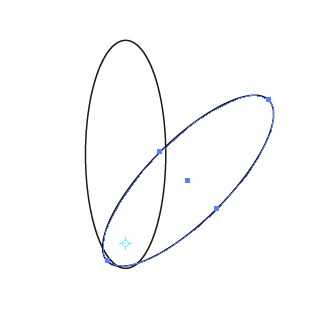
4. Use [⌘]+[D] to duplicate as many times as you need.

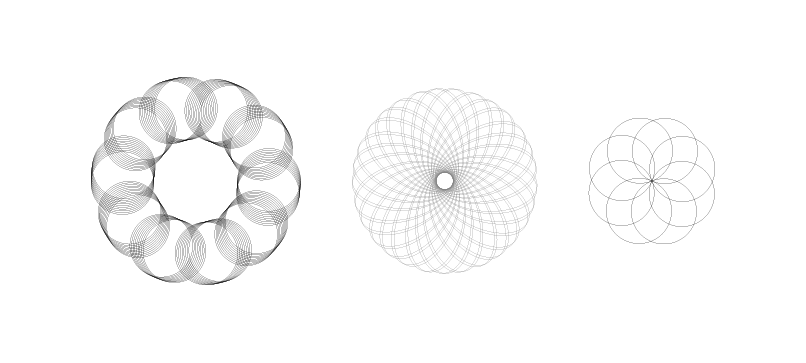
A spirograph has been created from a specified reference point.
I recommend this method because it allows you to specify a base point as you want and it is easier to handle the object.
Creating by specifying the center of an object for a reference point
(Using the Rotate tool dialog box)
1. Start up Illustrator and create an elongated circle on the document using the [Tool Panel] > [Ellipse Tool].
2. Double-click [Tool Panel] > [Rotate Tool] with the created circle selected.
3. The dialog box will be opened.
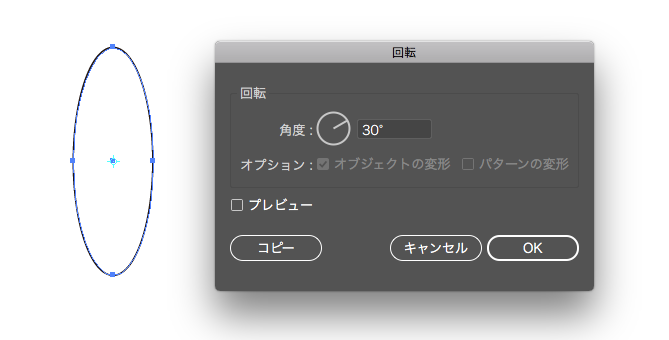
A reference point appears in the center of the object when the dialog box is opened.
If you use the dialog box to rotate the object, the reference point is automatically placed in the center of the object.
You can’t choose any other point.
4. Set the angle to 30 degrees and click [Copy].
A new object is created at 30 degrees from the reference point.
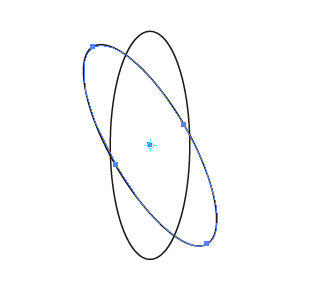
5. Use [⌘]+[D] to duplicate as many times as you need.
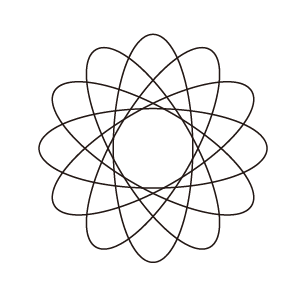
The spirograph was created based on the center of the object.
This is the explanation of the basic way to make a spirograph.
You can create various spirographs if you change the object’s shape, reference point, and angle. It’s possible to create various beautiful spirographs by a simple method.
In the next section, we’ll create a more complex spirograph!
For your reference
I made a video to show you how I created.
I hope it’ll help you to refer the shape of the object, the position of the reference point, the angle, etc.

This concludes the instructions on how to make a spirograph.
関連記事
-
 Mastering the Compound Path – Part2 (Practices)
 -
How to Disable Lorem Ipsum Text
-
Transforming Only Patterns in Illustrator
-
How to Create a Clipping Mask in Illustrator
-
How to Warp Text with Envelope Distort
-
How to make your own pattern brushes
-
How to Use Live Paint in Illustrator
-
How to Stroke Around Text