How to Use Live Paint in Illustrator
2020年8月26日

Have you ever used Live Paint in Illustrator?
In this article, we’ll explain it in detail for those who have never used it yet.
Preparetion
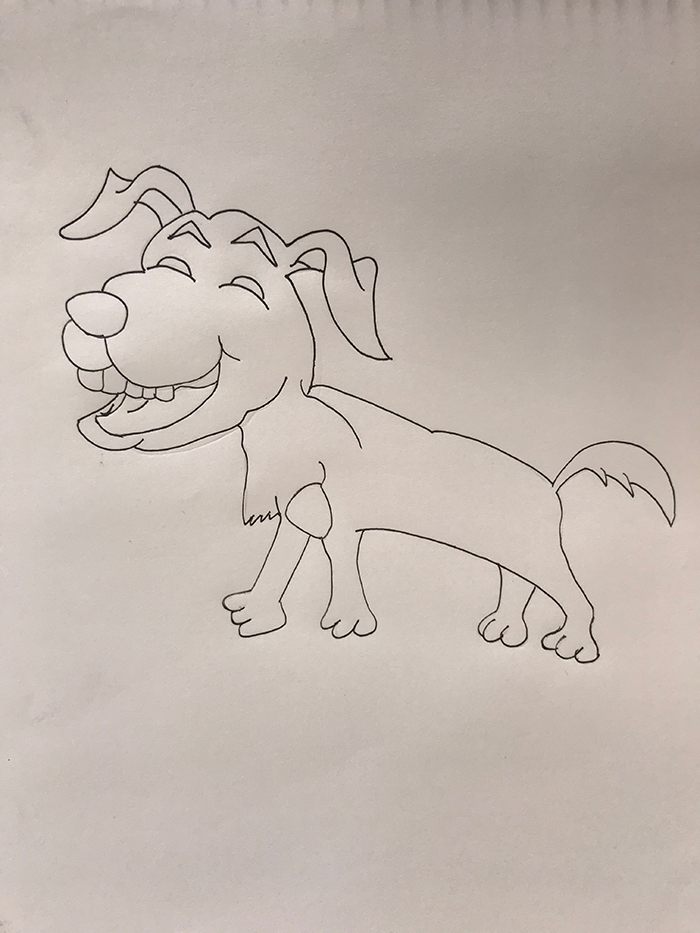
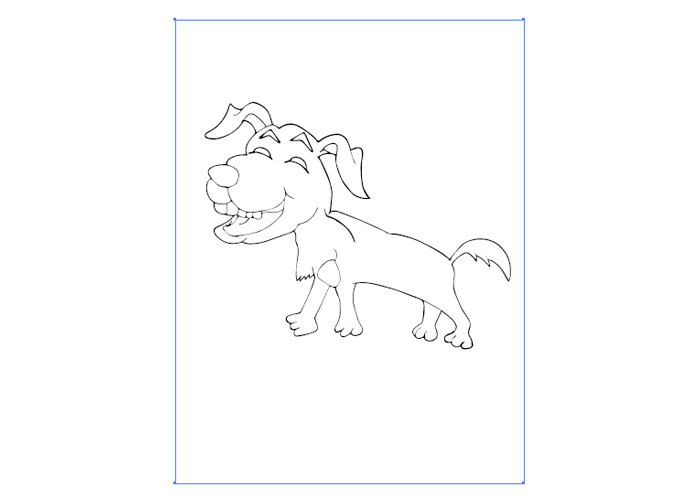
Draw an illustration and import it to your PC.
In this case, I drew this illustration and imported it.
You can use photos or scans of your illustration.
1. Open Illustrator and place your illustration
This time, work with [Size: A4], [Orientation: Vertical], [Color Mode: CMYK].
Click [File] > [Place] and place your image.
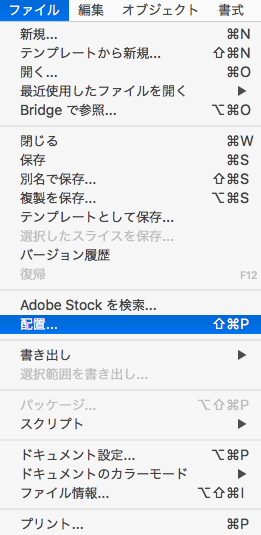
Image is placed.

2. Rasterize your image
Go to [Object] > [Rasterize].
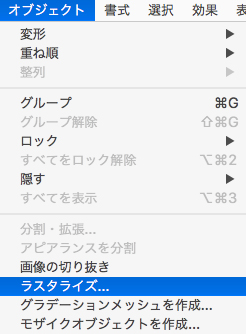
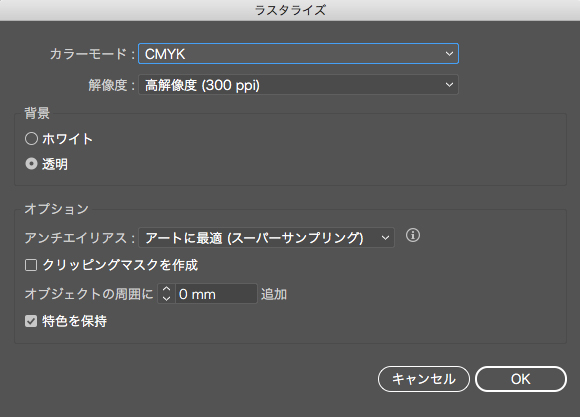
Set up the resolution in the [Rasterize] panel.
In this case, we set [Color Mode:CMYK], [Resolution: High (300ppi)] and [Background: Transparent].
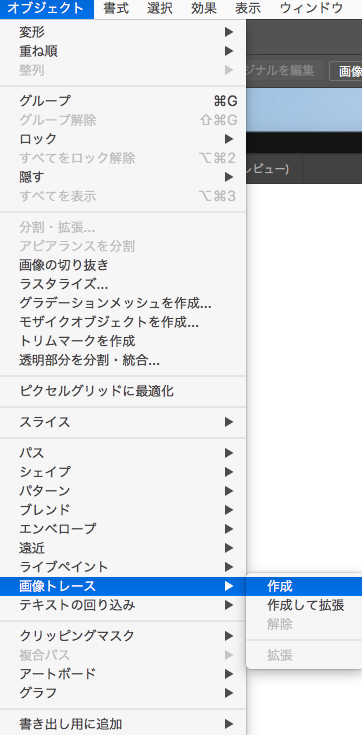
3. Use the Image Trace
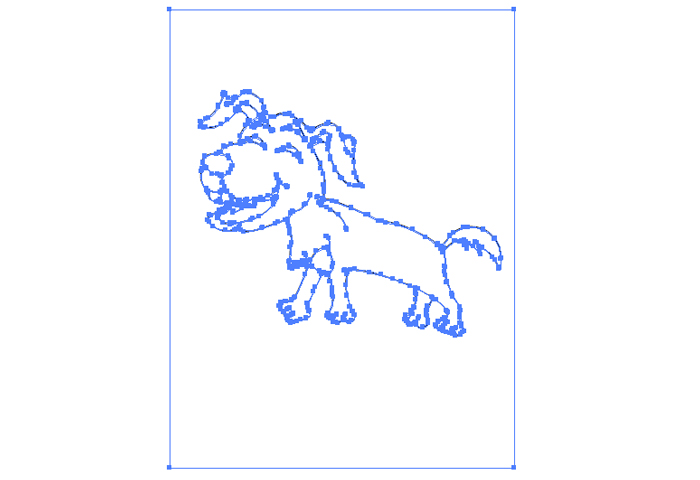
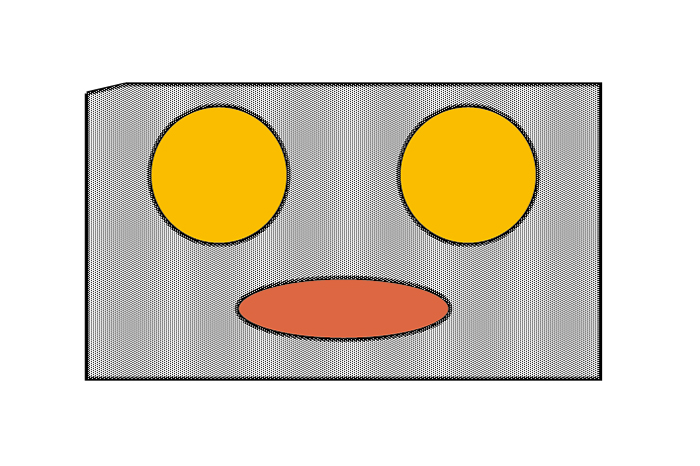
Choose [Object] > [Image Trace] > [Make].
The image will change like this.
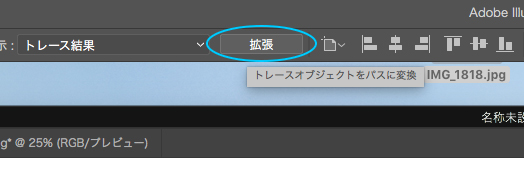
Then select [Expand] (Convert tracing object into paths) at the top of the artboard.
This will convert all the traces to paths.
Tracing object was converted into paths.
*If you have extra anchor points when you expand the traced image, you can ungroup them and delete them using the [Direct Selection Tool].
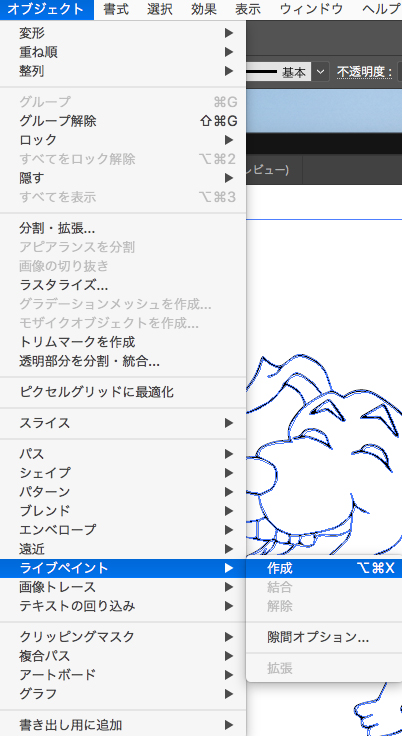
4. Create a Live Paint group
With selecting object converted into paths, choose [Object] > [Live Paint] > [Make].
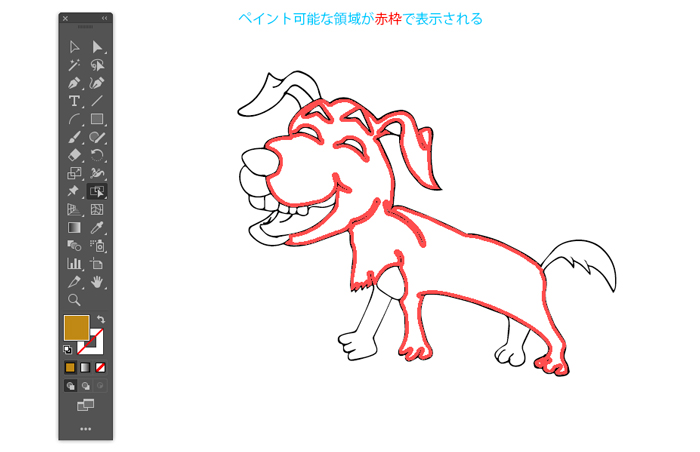
Select the [Live Paint Selection Tool].
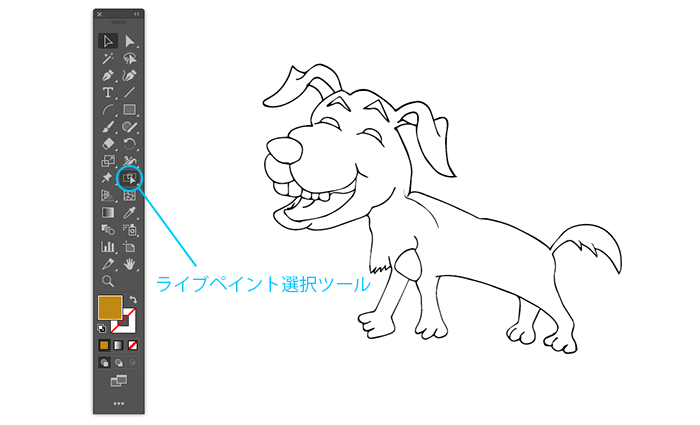
When the mouse is close to the target object, a red frame will appear.
You can paint the area individually.
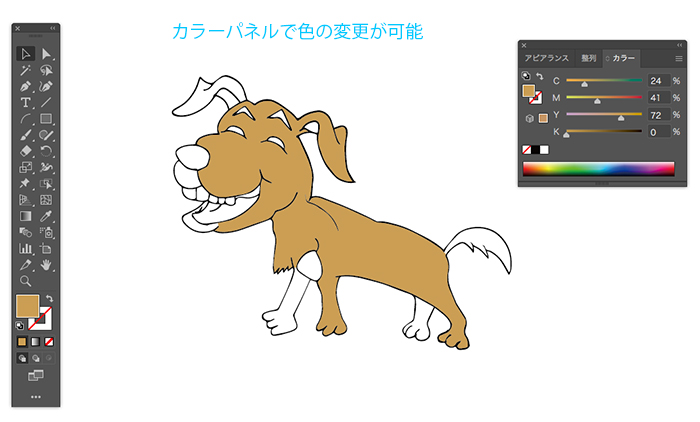
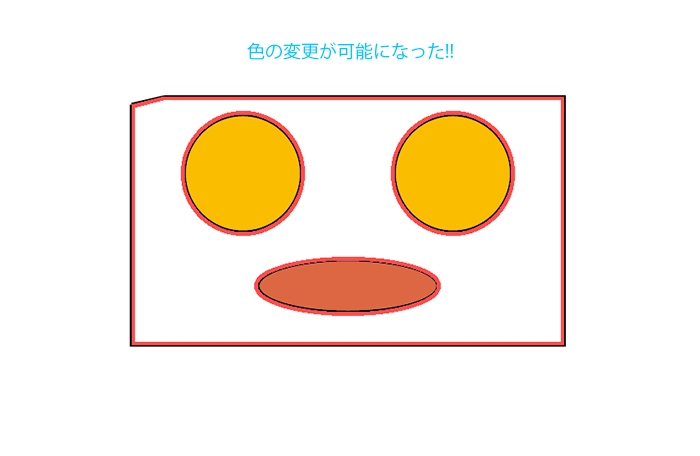
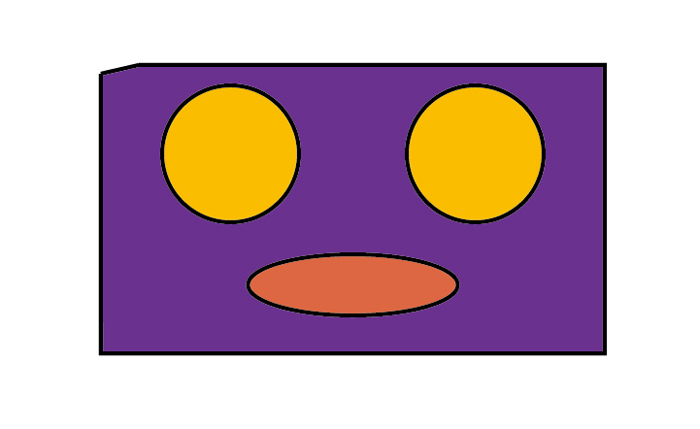
When you select the red frame, the face color will change. Then you can use the Color panel to change the fill color.

You can change the fill like this.
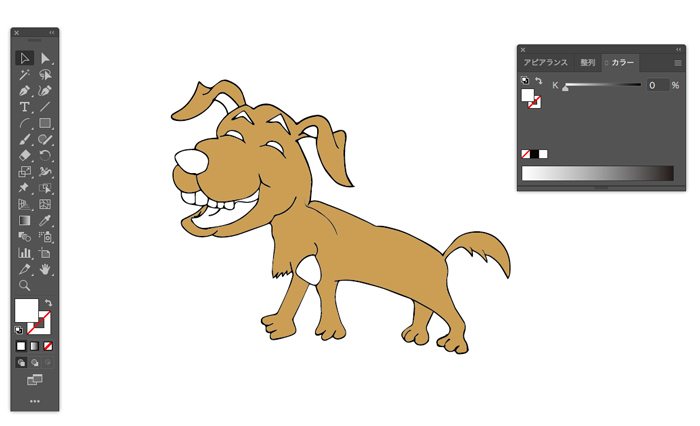
Repeat this and change all fills.
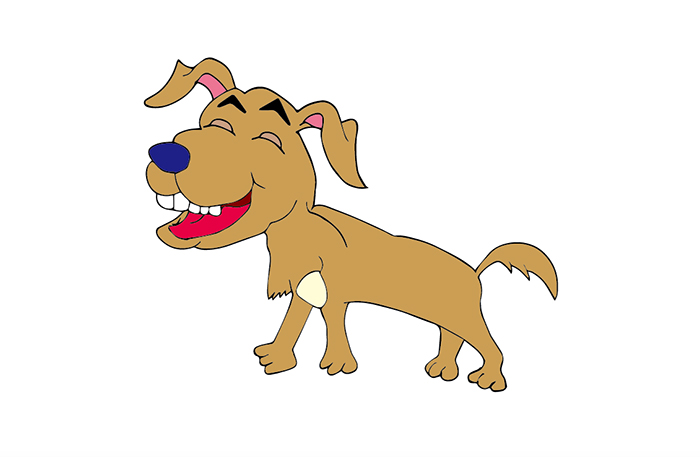
Finished!
Learn more
There’s one more useful feature in [Live Paint].
It’s [Gap Options].
For example, I prepared this object.
The corner paths are not closed.
You can’t change the color of this object with [Live Paint].
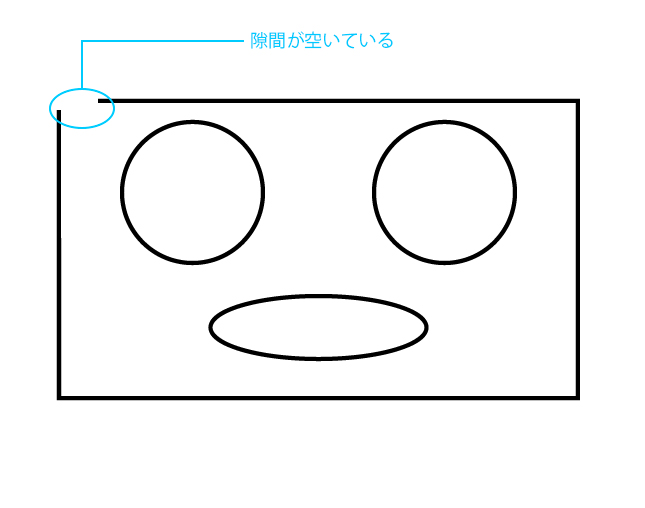
Only other objects with the closed path can be changed in color.
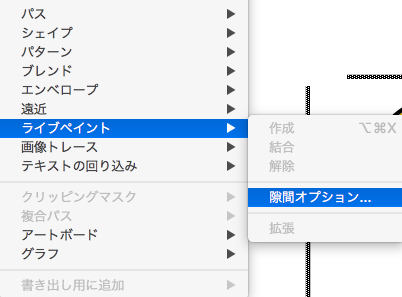
With the object selected, select [Object] > [Live Paint] > [Gap Options].
In the Gap Options panel, select the [Gap Detection] checkbox.
Then the number of gaps will be counted as “Gaps Found”.
Set the [Paint stops at] and [Gap Preview Color] to your liking, and then click [Close gaps with paths].
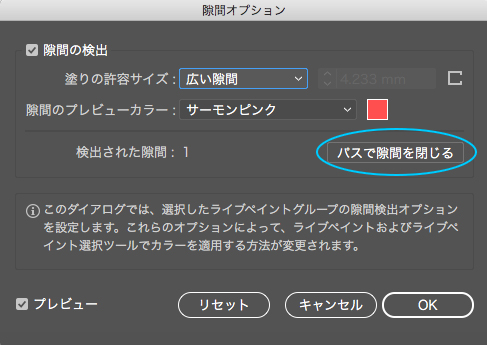
Then the gap was automatically closed with a pass!

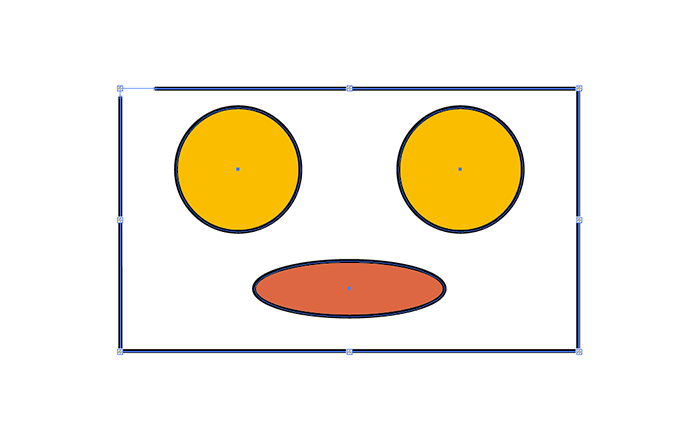
Now you can paint it.
Change the color and you’re done.
We used simple objects in this example, but you may use more complex objects in practice.
In that case, try setting the [Paint stops at] to [Small Gaps] or [Custom Gaps] in Gap Options.
How was it?
If you can master Live Paint, you can easily paint the illustrations without a pen tab.
How about trying to use it?
関連記事
-
 How to Create Superscript or Subscript in Illustrator
 -
How to Easily Recolor in Illustrator
-
Easy drawing with Shape tools in Illustrator
-
Design a 3D object in Illustrator!
-
Transforming Only Patterns in Illustrator
-
How to Map Symbols to 3D Objects
-
How to Make a Sunburst Vector Easily
-
How to Warp Text with Envelope Distort