How to Create a Clipping Mask in Illustrator
2020年8月20日

Have you ever heard of Clipping Mask? Clipping Mask is a feature that can be used to show only parts of object or to hide unwanted parts. It’s good to remember because we use it so often in Illustrator.
How to use
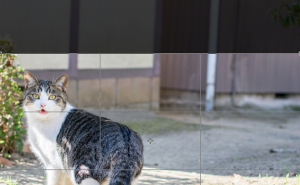
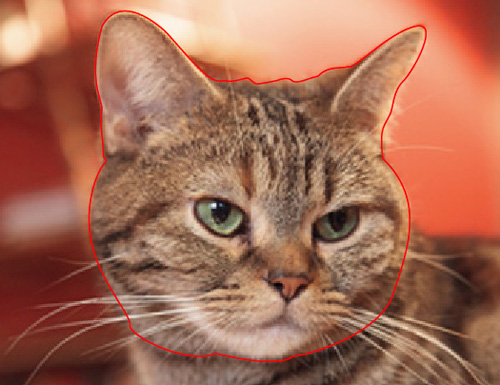
First, we need to prepare an image to cut out. In this case, I’m going to use this cat’s image.

Create a cutout shape object and place it on top of the image.
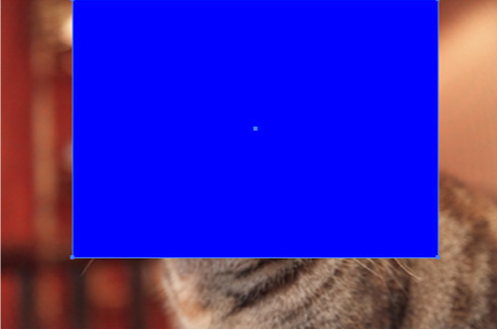
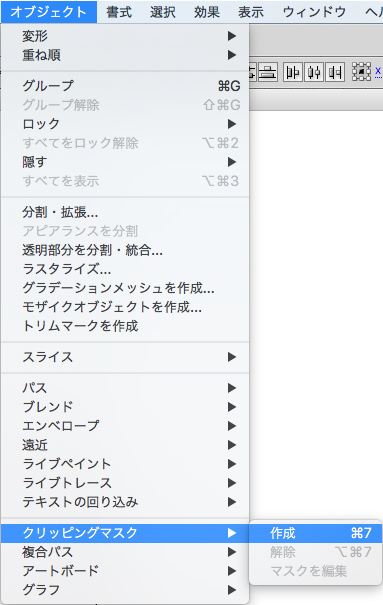
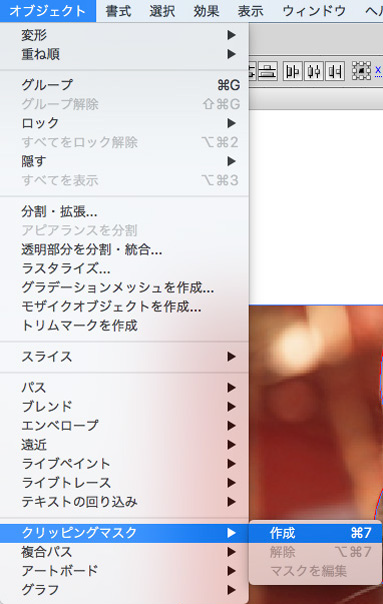
Then, with both the object and the image selected, select the Menu bar > Object > Make Clipping Mask (the shortcut key is command+7 for Mac / ctrl+7 for Windows).
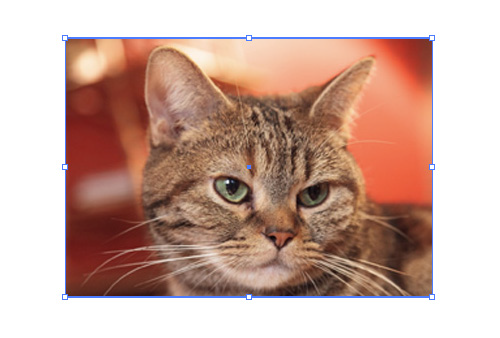
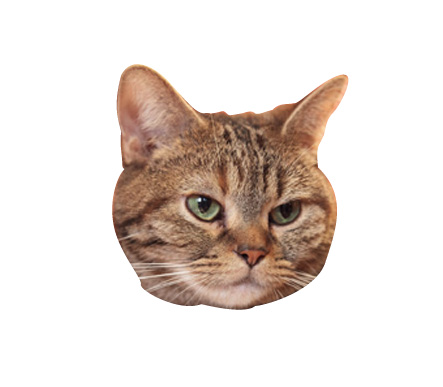
The image has been cropped in the shape of the object.
You can also use the Pen tool to crop the object. To do this, activate the Pen tool and put anchor points on the shape you want to crop.
Now all you have to do is create the clipping mask in the same way as before.
That’s all for this time.
関連記事
-
 Place text on a path in Illustrator
 -
How to Stroke Around Text
-
Making Olympic Rings Using Command X and Command F(B) in Illustrator
-
How to Use the Pathfinder in Illustrator
-
How to make a rainbow in Illustrator
-
How to Wrap Text Around Object
-
Using the Photoshop Crop Tool
-
Easy drawing with Shape tools in Illustrator