Place text on a path in Illustrator
2020年6月25日

Place type on a wavy line with “Type on a Path Tool”
First, draw a wavy path with the pen tool.
The color of the line will disappear when the text is placed on top of it, so use a color that is easy to see.
(It’s better not to have a fill in because it will get in the way.)
For more information on how to draw a curved line with the pen tool, check it out this article.
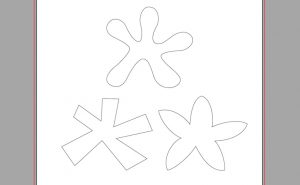
[Challenge] Pen Tool Practice: Can you do it in 1 minute?

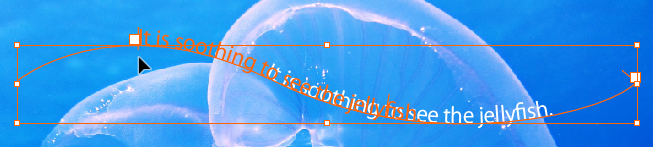
If you select the Type Tool and bring the cursor over the wavy line,
![]() The Type Tool’s cursor is
The Type Tool’s cursor is
![]() Turns into a cursor for the Type on a Path Tool.
Turns into a cursor for the Type on a Path Tool.

I could make text following along the path!
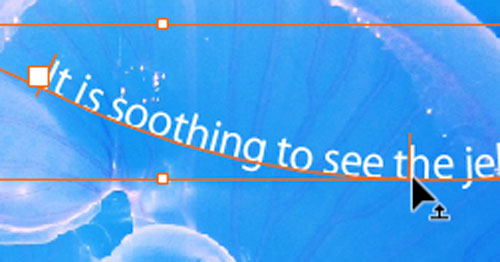
There are vertical lines at the beginning, end, and center of the letters.
These are called “brackets”.
When you move the cursor over the first bracket, the cursor changes like this.

You can move the beginning of type back and forth along the path.
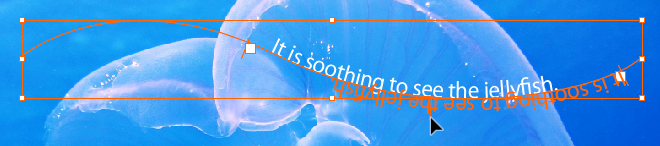
If you move the cursor over the middle bracket, the cursor will change like this.
You can change the direction of the text along the path.
Finally, adjust the text size and you’ll have a wavy text.

Threading text between objects

When you want to place the text without hiding the main visual, I recommend you this way.
First of all, draw a rectangle with the rectangle tool where you want to place the text.
(Draw the rectangle in a color that is easy to see, as the color will disappear when the text is placed on top.)
Next, select all of the rectangles you have just drawn,
select [Type] > [Threaded Text] > [Create]
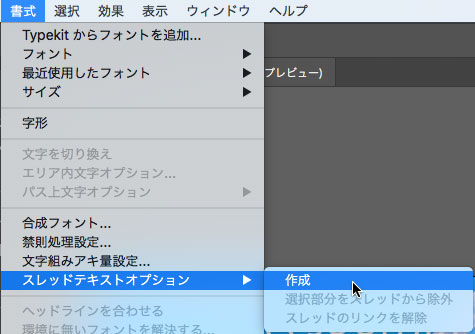
The square you just drew changes like this.

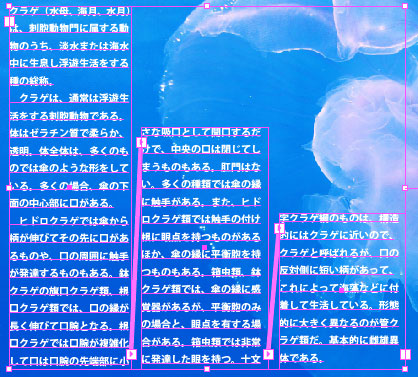
Enter text here. Then the letters will flow from the first object to the next object.
Now you have the Area Type.
However, the line endings aren’t aligned.
So, apply the “Justify Text Left” in the Paragraph Panel.

Don’t forget to do this when you create a frame and then enter the Area Type.
Now, Threaded Text is complete!
関連記事
-
 How to Make the Japanese Pattern
 -
How to Stroke Around Text
-
Mastering the Compound Path – Part2 (Practices)
-
[Challenge] Pen Tool Practice: Can you do it in one minute?
-
Use Warp Effect in Illustrator
-
Easy drawing with Shape tools in Illustrator
-
How to Create a Clipping Mask in Illustrator
-
Tracing Hand Lettering in Illustrator