How to Make the Japanese Pattern
2020年7月9日

Before we make the Japanese pattern, let’s take a look at the characteristics of the swatch pattern.
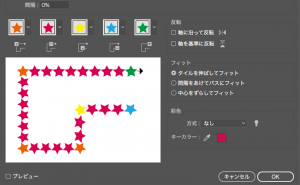
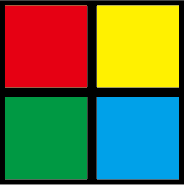
Register the following objects in the swatch pattern.

Then objects get stuck to each other like this.
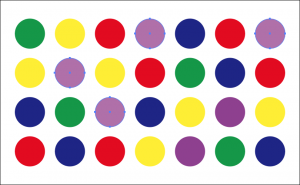
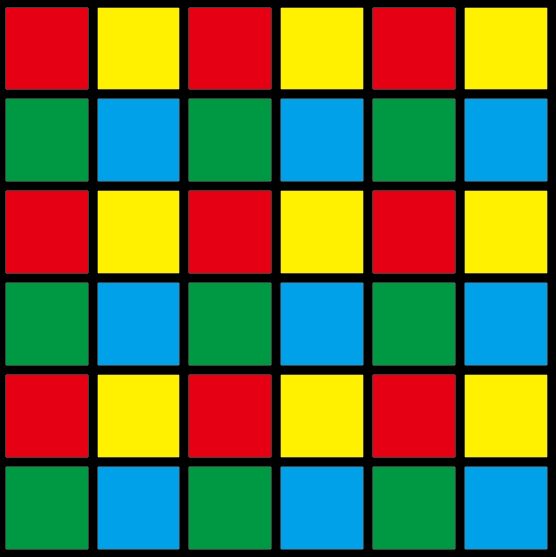
In such a case, create a transparent object (no fill and no line) one size larger than the pattern and place it at the back of the pattern.
It allows the objects to be spaced evenly.
In this case, I replace the transparent part with black for simplicity.
The black area is where the transparent object is applied.
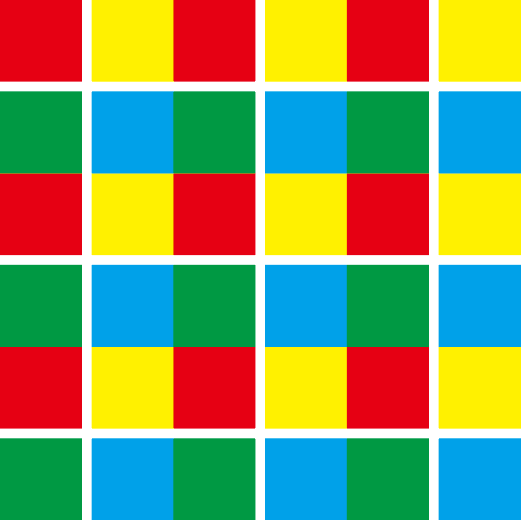
I’d like to make a Japanese pattern “Sangikuzushi” with this characteristic.
What is “Sangi-kuzushi”?
In Japan, there used to be a calculation tool called “Sangi”.
The word “kuzushi” means ” breaking” in Japanese.
“Sangi-kuzushi” came from the looks like a broken Sangi.
How to make the “Sangi-Kuzushi” pattern
Set the Smart Guide to “ON”.

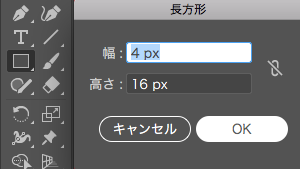
Create an object (W4px × H16px) using the Rectangle tool.
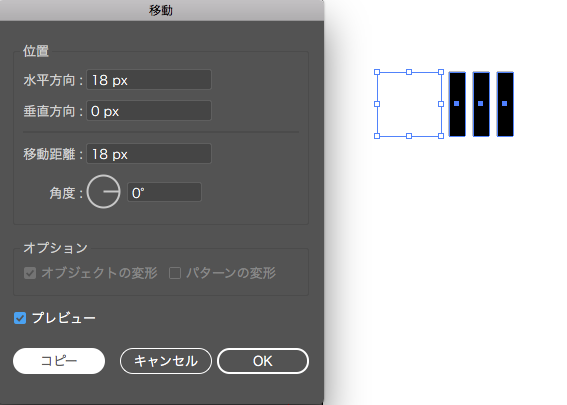
Select an object, go to [Object] > [Transform] > [Move].
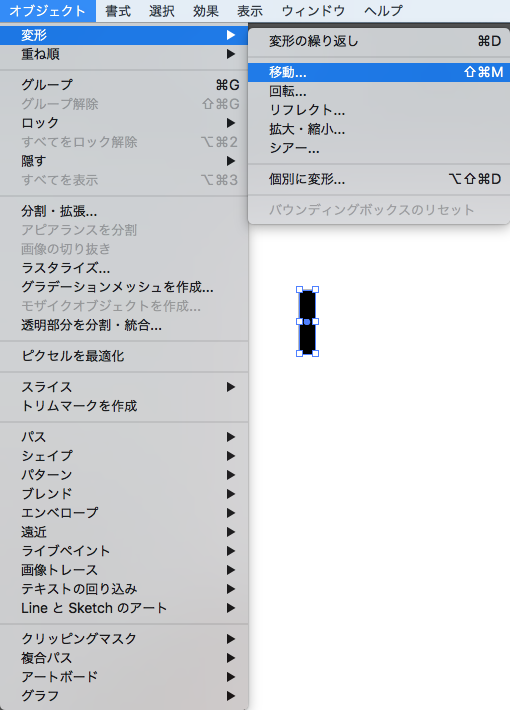
Enter [Horizontal: 6px Vertical: 0px].
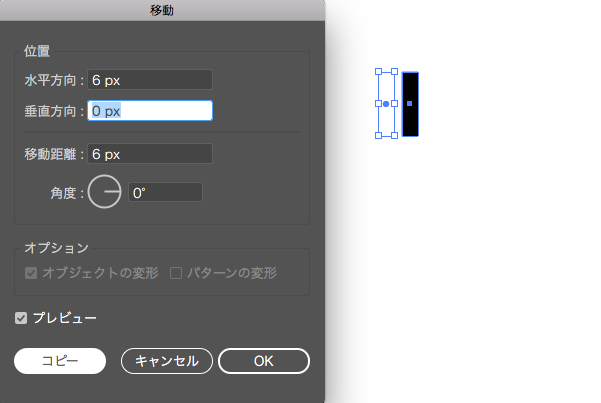
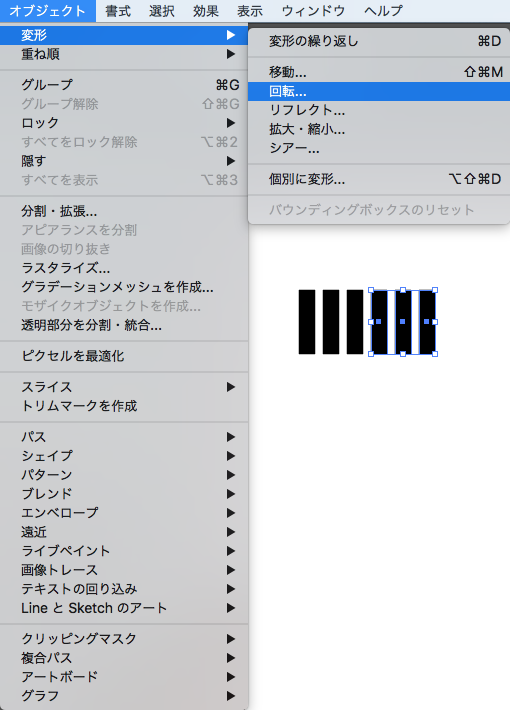
Copy the objects by [Object] > [Transform] > [Transform Again].
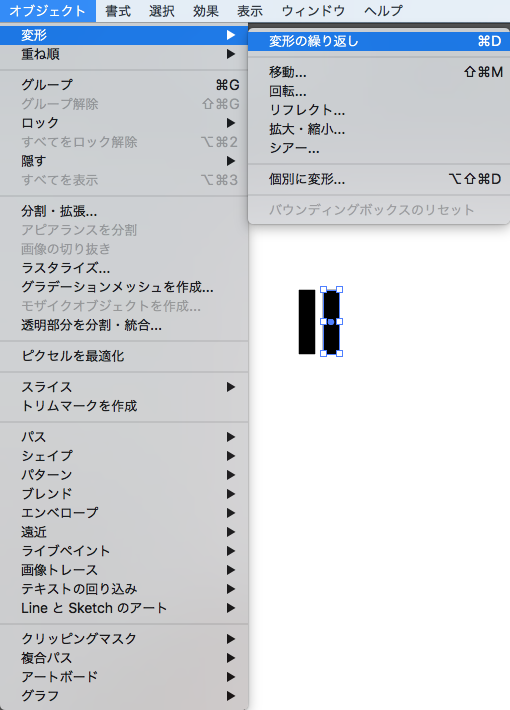
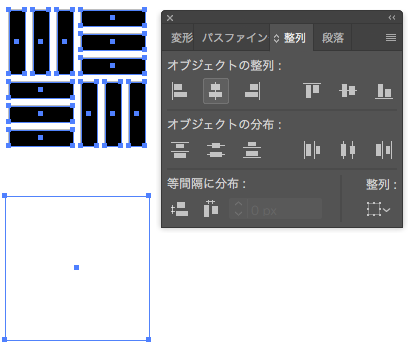
Select the three objects and go to [Object] > [Transform] > [Move].
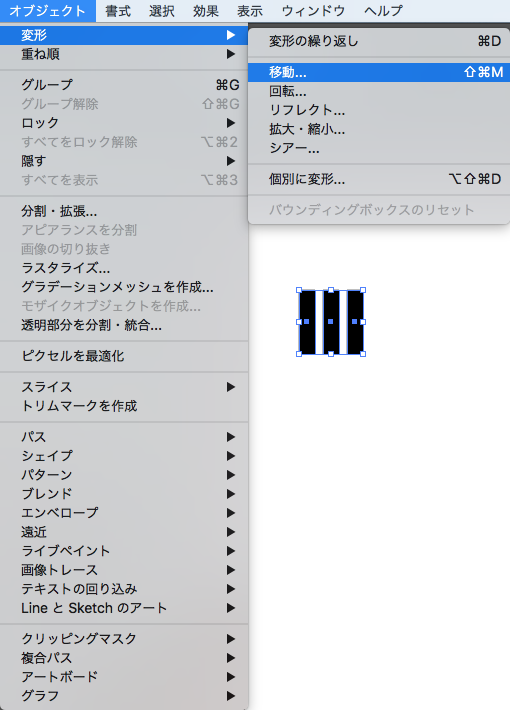
Enter [Horizontal: 18px Vertical: 0px] and copy them.
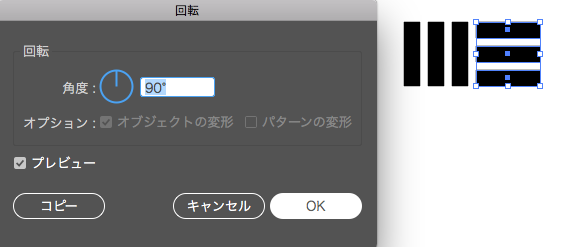
Then use the [Rotate tool] and set [angle: 90°].
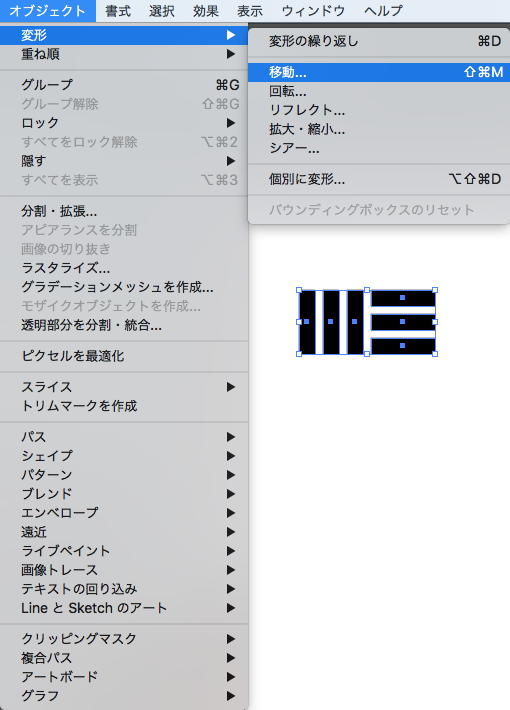
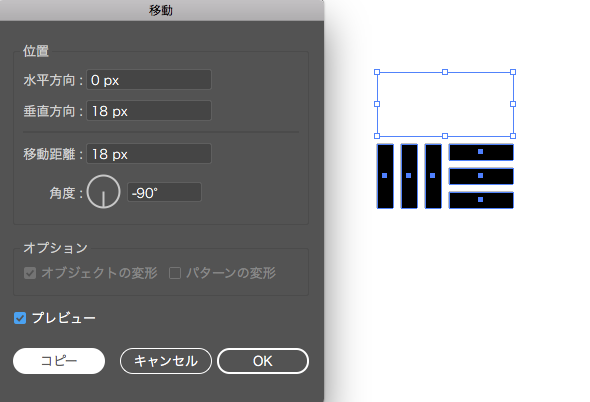
Select 6 objects and go to [Object] > [Transform] > [Move].
Enter [Horizontal: 0px Vertical: 18px] amd copy them.
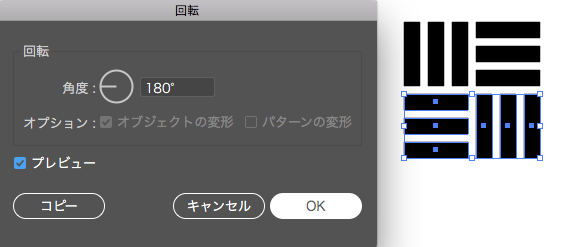
Use the [Rotate Tool] to set [angle: 180°].
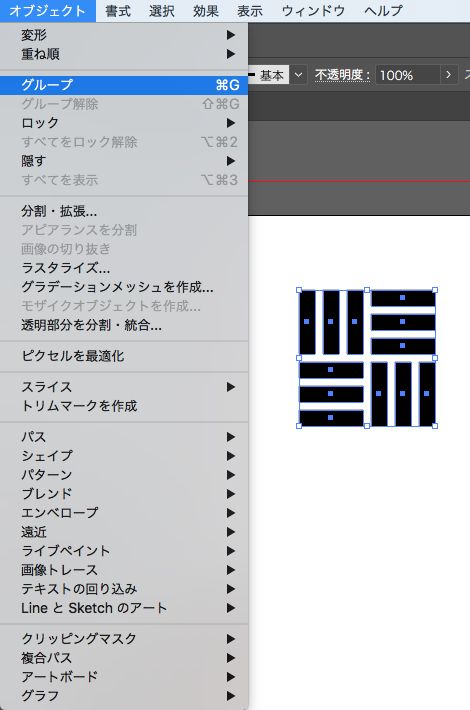
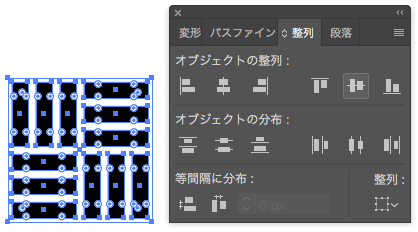
Makes all objects a group.
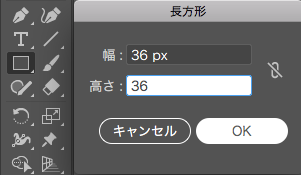
Create a transparent object that will go in the backmost.
Go to [Rectangle Tool] > [Width: 36px, Height: 36px] to create a rectangle with no fill or line.

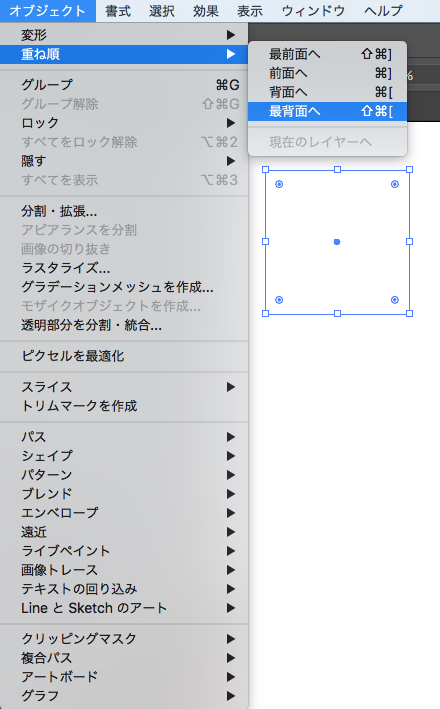
Choose [Object] > [Arrange] > [Send to Back].
Select all objects and go to the Align panel
to select [Horizontal Align Center] and [Vertical Align Center].
Drag it into the swatch panel to register in Pattern Swatches.
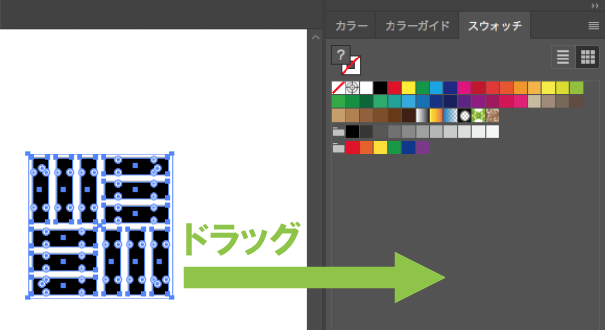
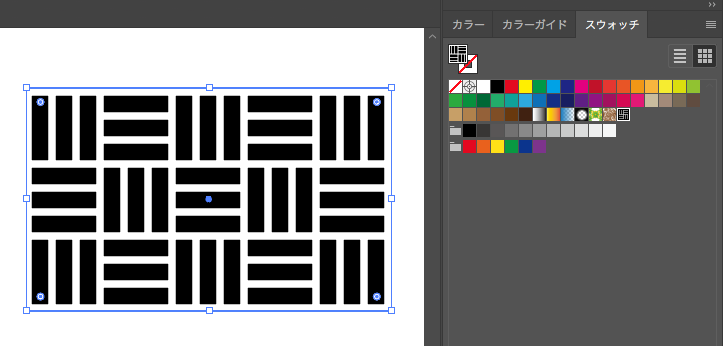
Now the “Sangi-kuzushi” pattern is done.
関連記事
-
 How to Wrap Text Around Object
 -
Create Speech Bubbles in Illustrator
-
How to Use Live Paint in Illustrator
-
How to Create a Clipping Mask in Illustrator
-
How to Make Trim Marks (Crop Marks)
-
How to make your own pattern brushes
-
How to Select All Objects of the Same Color
-
Place text on a path in Illustrator