The Still Life Photography Techniques Vol.1 – Natural Lighting
2020年6月29日
Recently, It’s popular to take pictures of your favorite things and foods with your phone or digital camera and show them to others on social media.
Also, there may be situations in which you take pictures of products to be advertised or listed in an auction. Shooting objects like that is called “Still Life Photography”.
If you understand the basics of Still Life Photography, you’ll be able to take the pictures you want to take. It allows you to create higher quality pictures more quickly.
So, let’s take a step-by-step approach to getting better at Still Life Photography.
4 tips for shooting Still Life Photography
- Lighting
- Placement and organization of objects
- Angle of view
- Composition
Here are 4 tips for getting better at Still Life Photography.
I hope that these will help you for shooting.
Lighting -Natural Lighting
What kind of light do you think makes objects look beautiful?
The answer is backlit or semi-backlit. A soft light in front of the subject gives the picture a three-dimensional, natural tone.
The easiest way to take beautiful pictures is to use natural light, that is, sunlight. There is no cost for lighting and other equipment.
However, you can only take pictures in the daytime, and the lighting conditions change depending on the time of day, so it’s not always possible to take pictures with the same light and different colors.
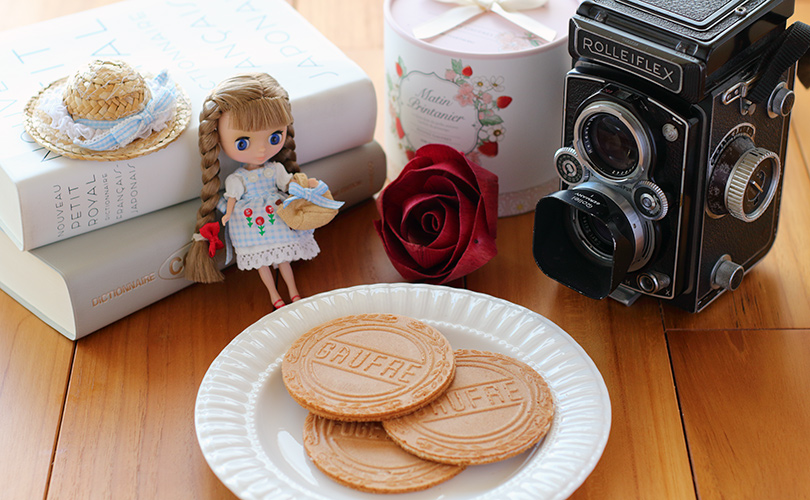
For example, food menus should be photographed in natural light. Now let’s take some pictures of foods that look delicious.
This is a set of natural lighting.
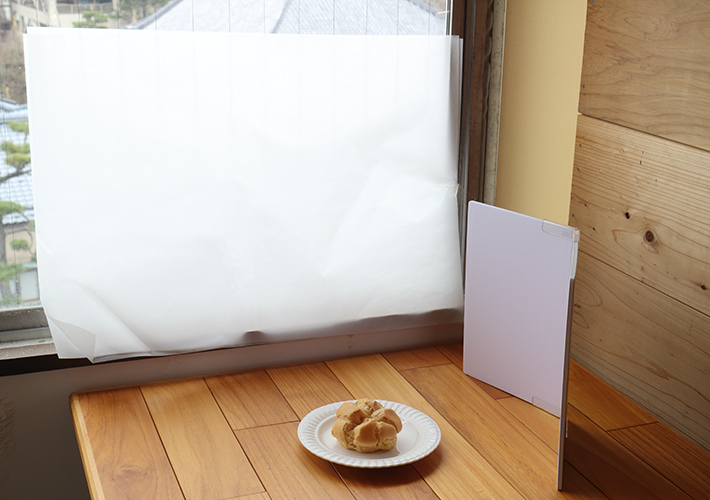
Put something to diffuse the light such as tracing paper or white sheets, on the window that the sunlight comes in. In direct sunlight, the light is hard and the shadows are strong, so you need to make the light softer in this way.
Next, supplement the brightness in the shadows of the subject by creating light from the side to the front with a white reflector.
Once you decided the composition, place the reflector as close as possible to the subject and adjust the position of the reflector so that the brightness of the shadow area looks natural.
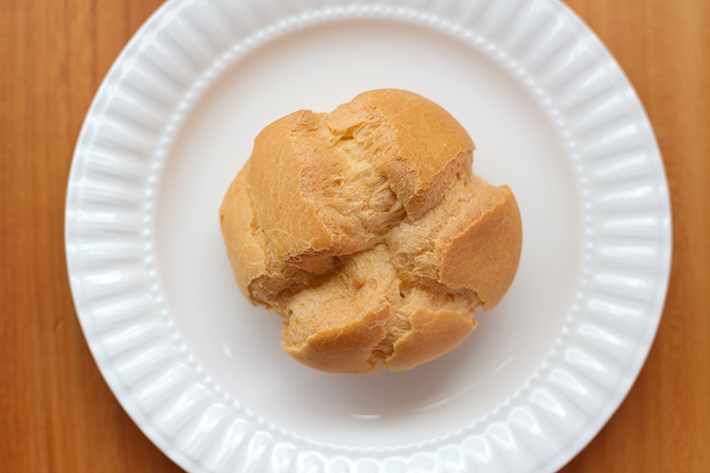
I took a cream puff with this lighting way. It has pistachio cream and you can see a little bit of it in the bottom right corner.
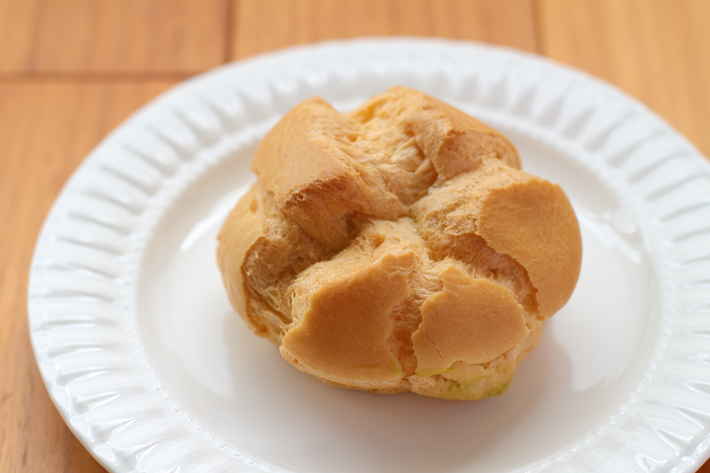
What do you think? Just this lighting, don’t you think the photo looks like an advertised photo?
Now, let’s analyze this picture a bit more.
Placement and organization of objects
I prepared a white plate so that the main subject, a cream puff, would stand out. The balance of size is also important.
Angle of view
In the case of the food close-up, a lens with an angle of view of 50mm to 100mm (35mm equivalent focal length) is easy to use and allows you to easily control the blur of the background.
This time, I used a digital camera with an APS-C sensor size of 50mm (about 80mm in 35mm equivalent focal length).
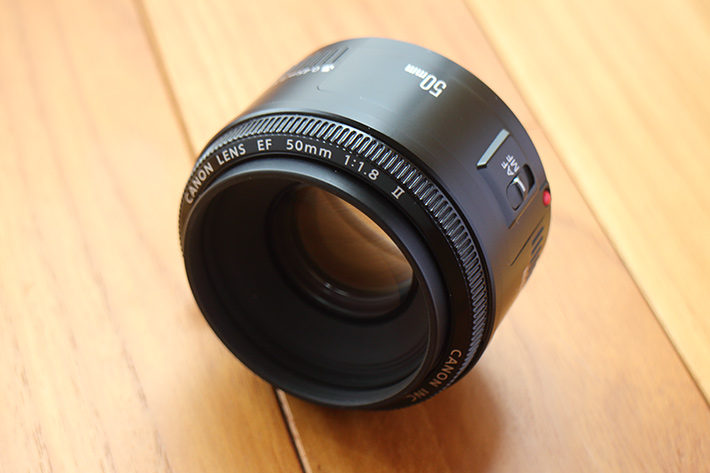
Using a brighter F-number prime lens will give you a more blurry background than using a darker F-number zoom lens.
Also, if you use an 80-100mm lens in the 35mm format, it has the advantage of reducing distortions in the shape of the subject and creating a blurred, three-dimensional view of the background due to the telephoto effect.
If you focus on a subject with a wide-angle or standard lens, the background will be blurred, but the shape of the subject will appear distorted because of the perspective.
For more information on the lens angle of view, this article “Choosing The Best Lens For Your Shooting” will be helpful.
Composition
There are no rules for shooting angles or compositions, but the standard way to take still life photos is shooting from directly above, directly in front of subjects, or at an angle of 45 degrees.
If you shoot from right above or right in front of subjects, you’ll get an explanatory shot, but if you shoot at an angle, you’ll get a shot that conveys an impression.
If you take a picture of the food on a plate, imagine you are seated and eating it.
It will look delicious if you shoot it at the angle you are looking at it.
Of course, that’s not all, but it’s one thing to look for a fresh angle that you’ve never seen before methods.
Also, if you try to include everything in your composition, your main subject will be small and unnoticeable. So, it may be more eye-catching to have part of it out of the screen.
Horizontal is the standard, but I sometimes tilt the camera to make it look more impressive.
The other thing to do is to try to take a lot of shots with slightly different angles and compositions to find out which cuts are good for your taste.
It’s also important to know where to focus on your subject and how the range of focus (depth of field) with different lens apertures will change the look of the shot.
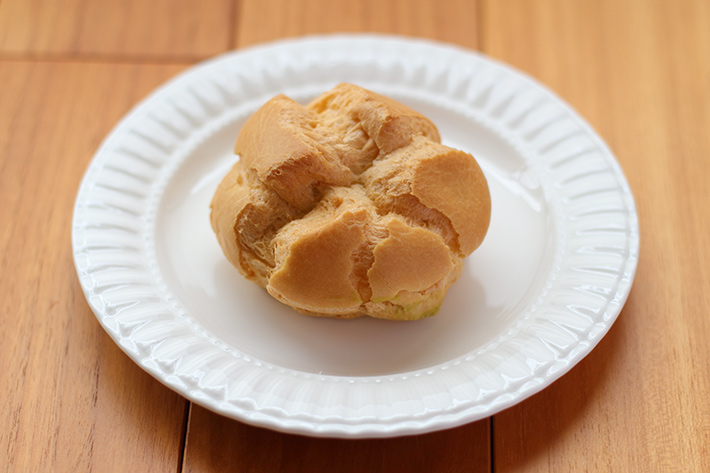
Then, let’s back to the first shot again.
2 points for great still life photographs
- Brightness
- Color temperature
These two things are the key for beautiful still life photography.
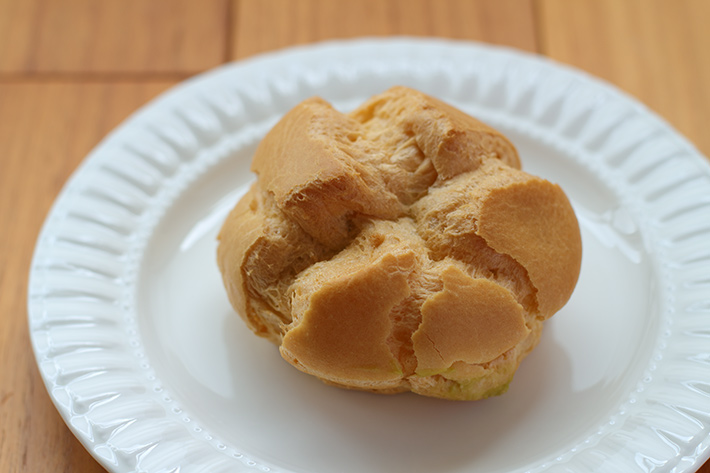
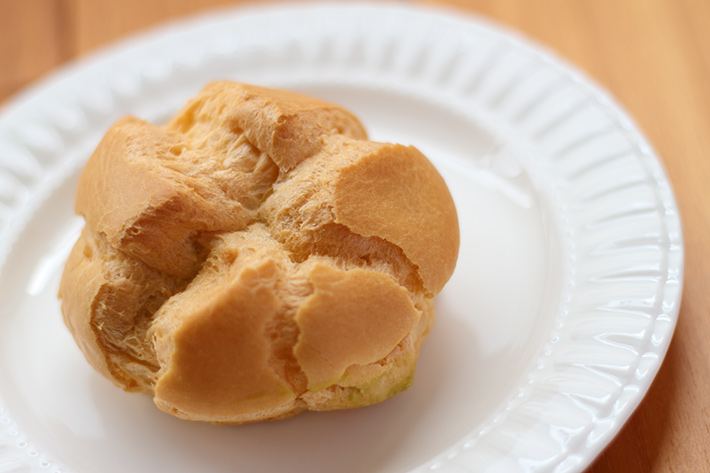
It’s the same photo, but if the brightness and color temperature aren’t right, the impression will look very different.
The bottom one is a bit darker and has a higher color temperature than the top one, so the whole thing looks bluish. This one doesn’t look very tasty. As you can see, brightness and color temperature have a big impact on the impression of a photo.
For more information on correct exposure, please refer to the article “Taking Photos with Correct Exposure, Part 1” and this article “Taking Photos with Correct Exposure, Part 2”. About color temperature, you can also use this article “Setting the White Balance to Take Good Color Photos”.
By the way, I took all of the photos in RAW data at this time. Because you can adjust the brightness and color temperature without worrying about image degradation after shooting. That allows you to focus on lighting and composition, which you can’t redo later.

When you open the RAW data directly in Photoshop, The plug-in “Camera Raw” starts up automatically and goes into RAW processing mode.
Adjust color temperature, brightness, contrast, etc. in detail and output the image from RAW data.
You can adjust brightness or tone of jpeg photos later in Photoshop or other software, but you can’t fix things like crushed shadows or blown highlights, and the larger the amount of correction, the worse the image will be.
However, when you adjust the RAW data, the data itself does not change, so it is useful to adjust the image many times to achieve the desired result without degradation.
Most digital cameras have their own RAW development software.
You can use both the original software and third party software such as Photoshop to develop your images in RAW format.
They are basically same, but there are some differences in the way the tone comes out and the parameters that can be processed, so it’s interesting to try out different things.
Next article, “The Still Life Photography Techniques Vol.2 – Artificial Lighting”, I’ll give you some tips on how to take pictures using fluorescent lights, which are easy to use as lighting for photography.
関連記事
-
 How to Make a GIF Using Ezgif.com
 -
The Still Life Photography Techniques Vol.2 – Artificial Lighting
-
Best 4 Sites for Free Stock Photos (Commercial use allowed)
-
The 19 Best Free Stock Photo Sites
-
[Challenge] Pen Tool Practice: Can you do it in one minute?
-
Keycastr: Show Your Keystrokes on Display
-
Clipy: The Best Free Clipboard App