The Basics of Layer Comps
2020年7月14日
The “Layer comps” in Photoshop is useful function that saves the visibility of the layers and allows you to easily switch between them with a single button.
By saving the display state of the layers, you don’t have to change the display one by one.
In this time, I’ll show you the basic way of layer comp.
Switching layers
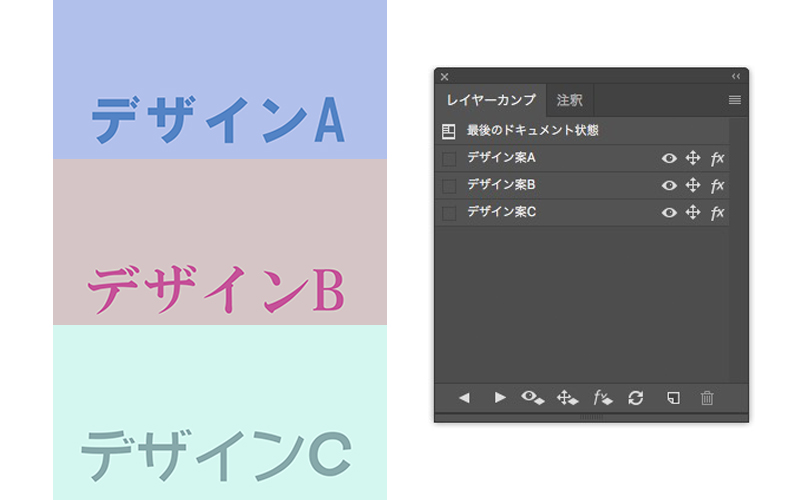
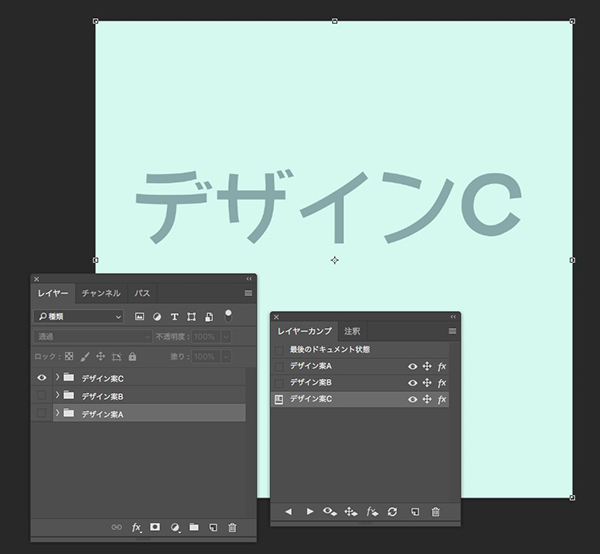
I created three designs, Design A, Design B and Design C.
Each design is made by background color layer and a text layer.
Now let’s use the layer comps.
Go to [Window] > [Layer Comps].
The Layer Comps panel appears.
Next, save the layer state.
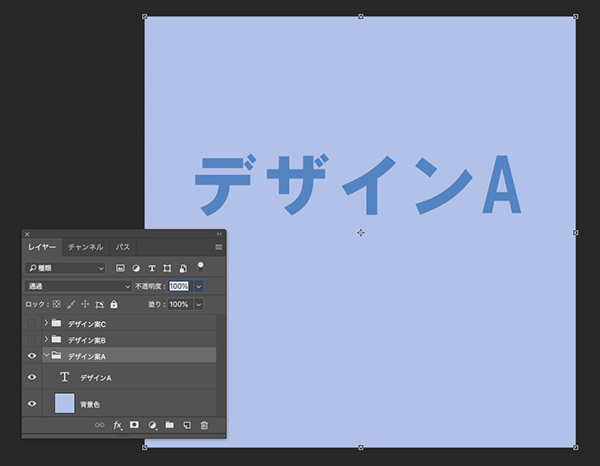
First, save the Design A.
Show only Design A in the Layers panel and hide Design B and C.
With this state, click the [Create New Layer Comp] icon at the bottom right of the Layer Comps Panel.
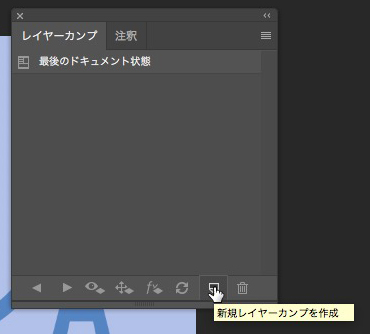
The dialog box will open.

There are three layer comps options in the dialog box. You can set these options later.
・Visibility
・Position
・Appearance
Now you have saved the comp of Design A.
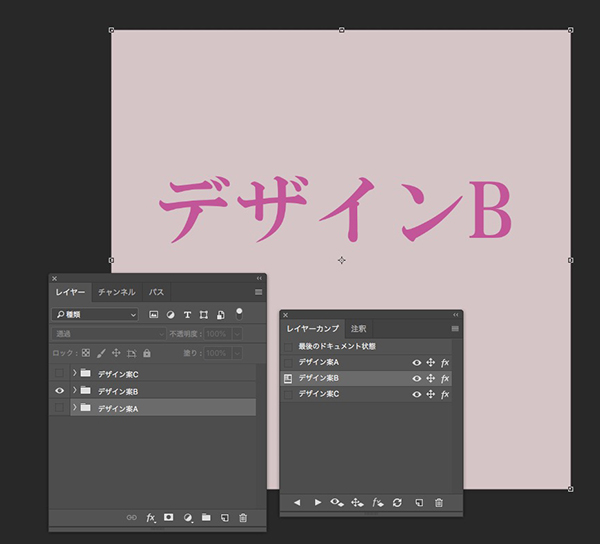
Similarly, save the design B and C comp.
Now you can see the each design just by clicking on the icon to the left of the comp name.
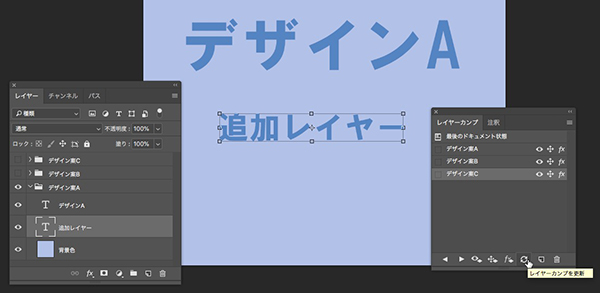
If you create a new layer after saving the layer comp, you need to update it.
For example, if you create a new layer in Design A, you can’t see the new comp without updating.
To update, click the “Update Layer Comp” button.
This is the basic use of layer comps.