【Illustrator】図形ツールで簡単イラスト
2024年7月29日

目次
【Illustrator】図形ツールで簡単イラスト
図形ツールで簡単にねこちゃんが描けます。
STEP
新規ファイルの作成
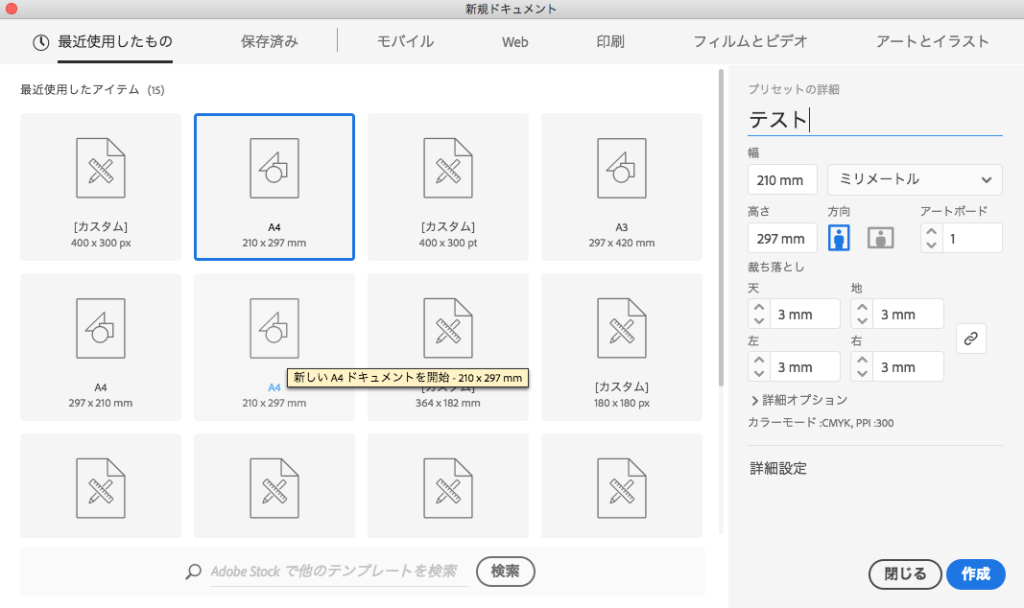
Illustratorを起動し、任意のサイズ・設定で新規ファイルを作成します。
STEP
楕円形ツールで顔部分を作成
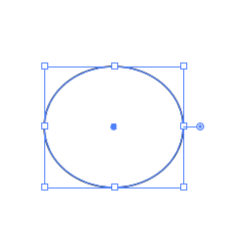
ツールパネルから「楕円形ツール」を選択し、以下の設定で楕円形を作成します。
線:任意の色
塗り:なし
線幅:任意のサイズ (ここでは1ptの設定)
STEP
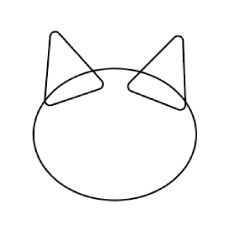
多角形ツールで耳部分を作成
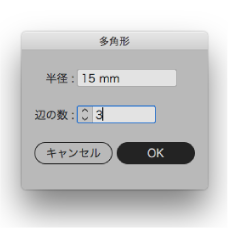
ツールパネルから「多角形ツール」を選択し、空いているところをクリックして、
「多角形」パネルで「辺の数」を「3」にして、三角形を作成します。
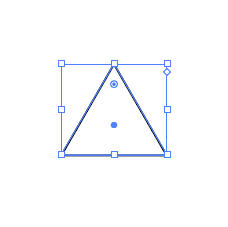
「選択ツール」に切り替えて、作成した三角形を選択して、
耳の形になるように変形したり、角を丸くしたり調整をします。
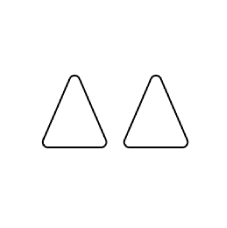
耳の形を調整したら、複製して耳を二つにします。
STEP
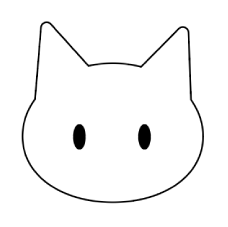
顔と耳部分を合体
STEP2とSTEP3で作成したパーツを配置します。
※必要に応じて、パーツのサイズや形を調整してください。
パーツの位置や形を調整後、
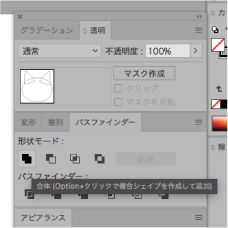
パーツを全て選択した状態で「パスファインダー」パネルの「合体」をクリックします。
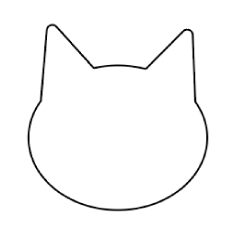
「合体」すると画像のように顔と耳部分ができます。
STEP
目部分を作成
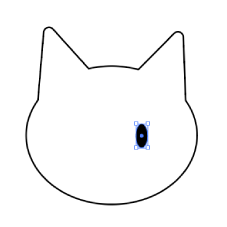
再びツールパネルから「楕円形ツール」に切り替えて、
縦長の楕円形で目のパーツを作成します。
作成した片目を複製して、両目を配置します。
必要に応じて顔パーツのサイズ等も調整してください。
STEP
鼻部分を作成
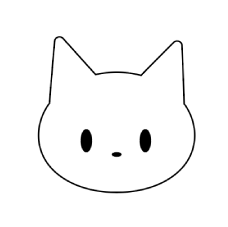
目のパーツと同様に「楕円形ツール」で
横長の小さめの楕円形で鼻部分を作成し、配置します。
STEP
口部分を作成

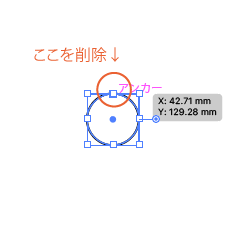
「楕円形ツール」で小さめの正円を作成し、
「ダイレクト選択ツール」に切り替えて
画像2枚目の赤丸部分のアンカーポイントを削除します。

アンカーポイントを削除すると画像のような半円ができます。
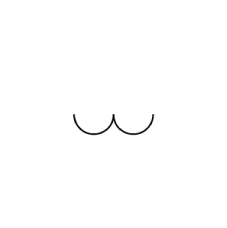
半円を複製し、二つ並べて口の形にして、
2つのパーツをグループ化([Ctrl]+[G])しておきます。

作成した口を顔に配置して、必要に応じてサイズ等を調整します。
STEP
ひげ部分を作成

ツールパネルから「直線ツール」を選択し、画像のように3本線を作成します。
この時、作成した3本線をグループ化([Ctrl]+[G])しておきます。
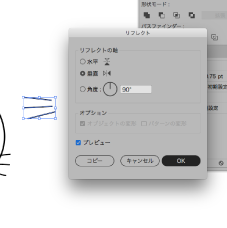
作成した3本線を選択した状態で右クリックし、
[変形]>[リフレクト]を選択して、以下の設定で左右反転の3本線を複製します。
リフレクトの軸:垂直
[コピー]をクリック
STEP
完成

STEP9で作成したひげ部分を顔に配置し、
必要に応じてパーツのサイズを調整したら完成です。

お好みで線の色を変えたり、目の形や顔を変形させたりなど
アレンジもしてみてください。