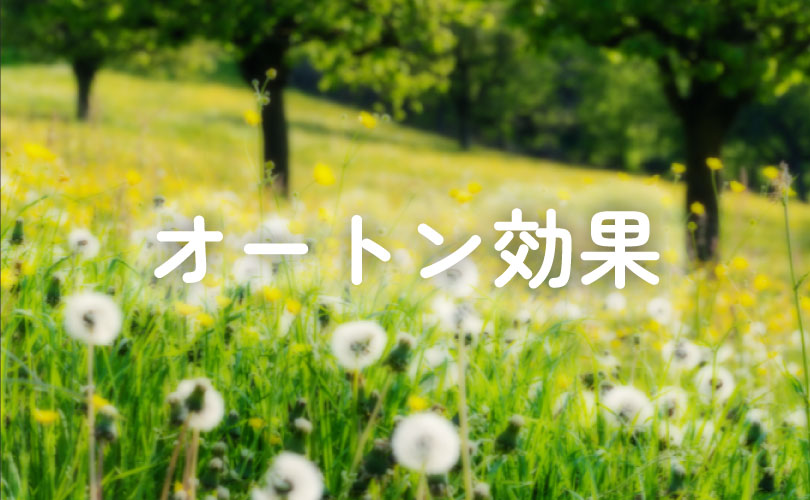
【Photoshop CC】オートン効果で柔らかい雰囲気に
2024年5月15日
目次
【Photoshop CC】オートン効果で柔らかい雰囲気に
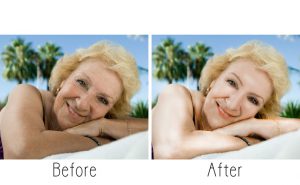
この記事コンテンツではPhotoshop CCの機能を使った「オートン効果」のつくり方について解説しています。
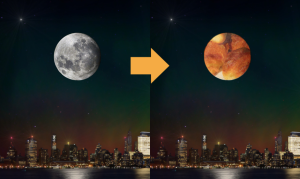
オートン効果とは?
オートン効果とは、写真現像技法の一つで、写真に柔らかい雰囲気や幻想的な雰囲気を加える効果のことです。1980年代半ばにカナダの風景写真家マイケル・オートン氏によって考案されました。
当時、水彩画に影響を受けたオートン氏は柔らかい優しい印象の写真を追求していました。しかし、当時の写真現像技術では、そのような効果を簡単に実現することはできませんでした。
そこで、オートン氏は同じシーンの2枚の全く異なる写真をブレンドし、現像する方法を考案しました。1枚目のフィルムはハイライトを上げて、2枚目のフィルムはシャドウを上げて現像することで、ふんわりとした優しい印象の写真を実現しました。
この技法は、オートン氏の名前にちなんで「オートン効果」と呼ばれるようになりました。
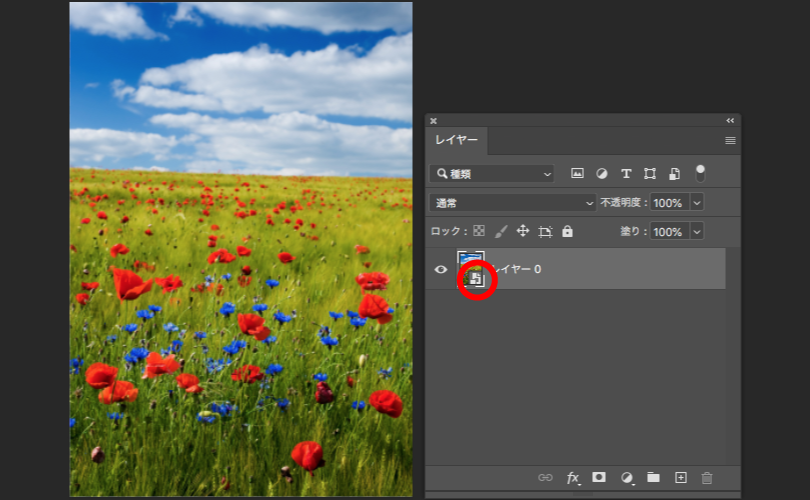
つくりかた
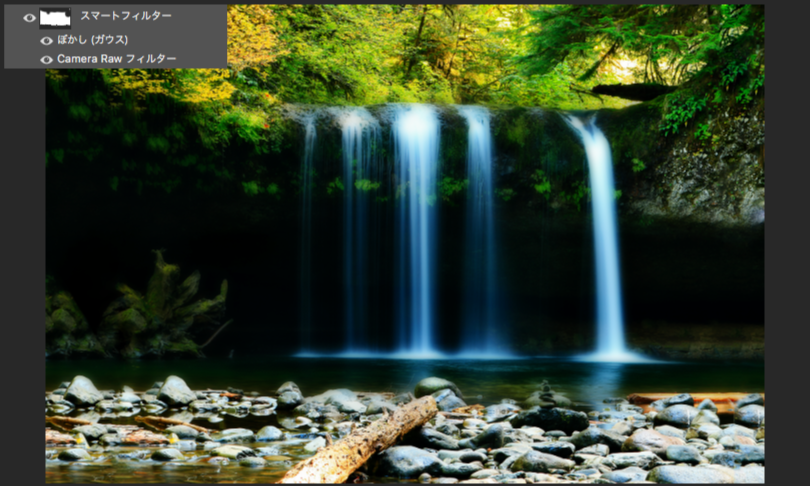
1.画像を配置し、スマートオブジェクトに変更します。
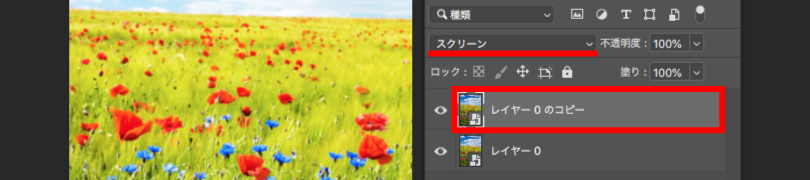
2.配置したレイヤーを「複製」し、描画モードを「スクリーン」に変更します。
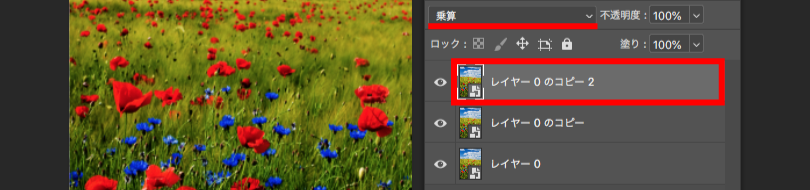
3.複製したレイヤーをさらに「複製」し、描画モードを「乗算」に変更します。
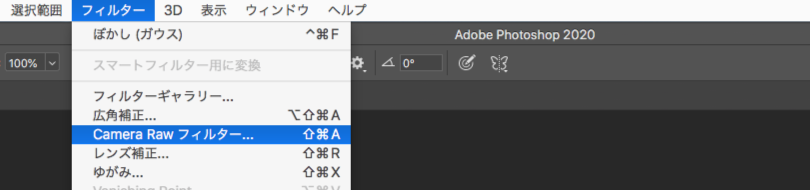
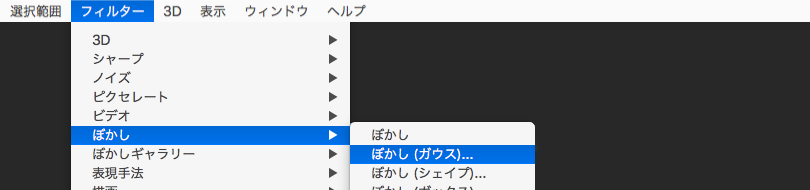
4.メニューバーの「フィルター」から「Camera Raw フィルター」を選択します。
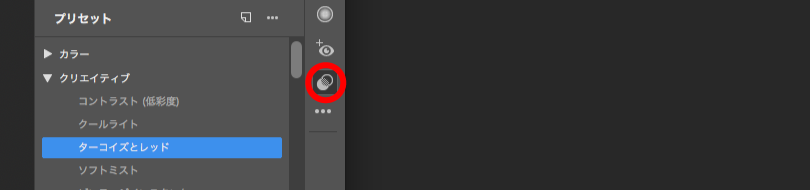
5.編集パネルが開いたら、右側のプリセットのアイコンをクリックし「クリエイティブ」から画像に対し適切なものを選択します。
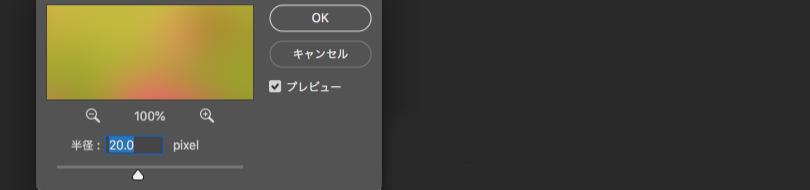
6.メニューバーの「フィルター」から「ぼかし」の「ぼかし(ガウス)…」を選択し、適度な数値(10~20pixel)を入力します。
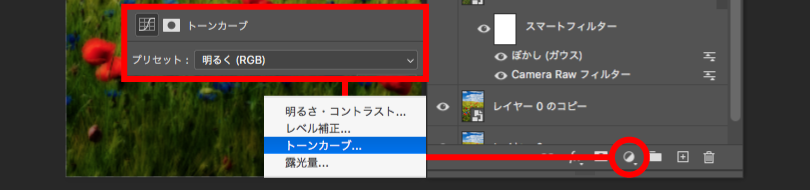
7.レイヤーパネルの「調整レイヤー」から「トーンカーブ…」のプリセット「明るく(RGB)」を選択します。
必要に応じて、再調整します。
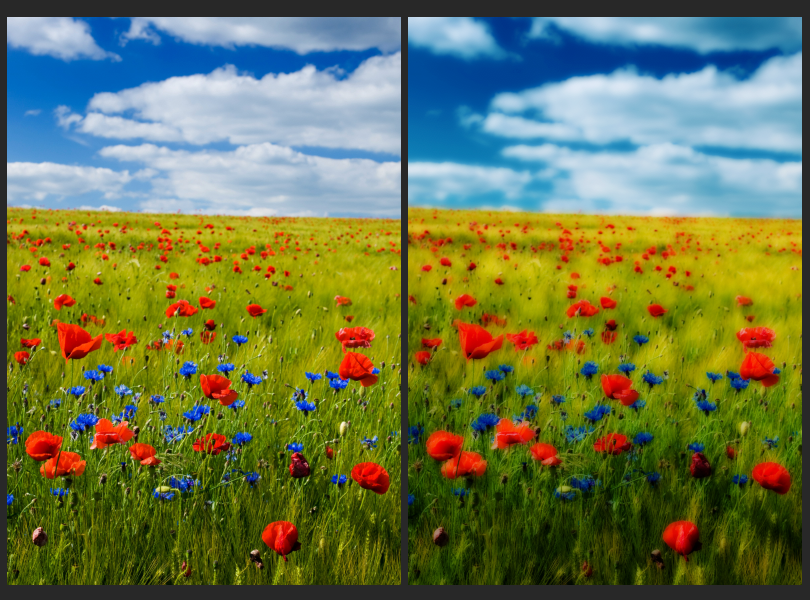
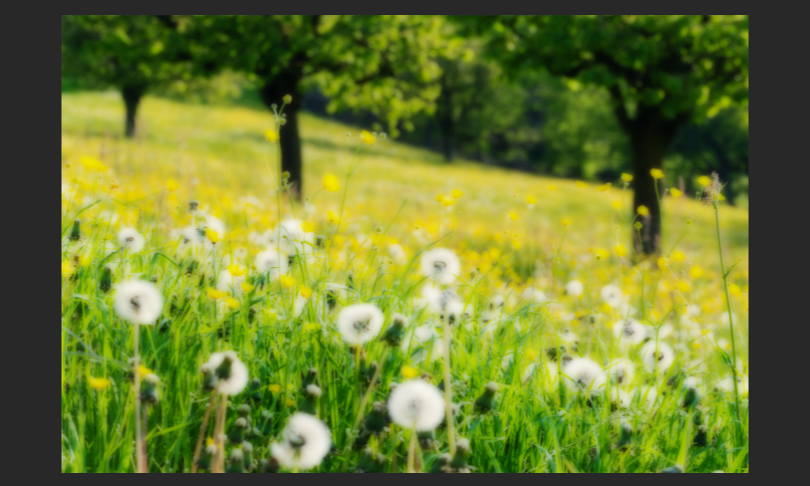
オートン効果は風景写真と相性がよいと思われます。
扱う写真の目的によっては部分的に効果をかけるのもいいのかもしれません。

オートン効果の注意点
- かけすぎると写真が不自然になってしまう場合がある。
- すべての場面で効果的なわけではない
- 写真の内容によっては、写真のイメージが損なわれてしまうこともある